Книга: Embedded Linux development using Eclipse
8.2.2 CVS in Eclipse
8.2.2 CVS in Eclipse
Like most Unix/Linux software packages, CVS is strictly command line-driven. But of course, Eclipse wraps a graphical user interface around that, just like it does for gdb. The CVS GUI is embodied in the CVS Repository Exploring perspective. The blank CVS perspective shown in Figure 8.18 isn’t very exciting.
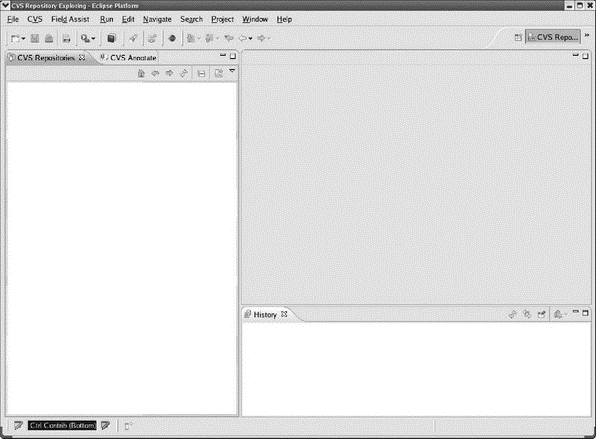
Figure 8.18: Blank CVS Repository Exploring perspective.
To see how CVS works, we’ll have to connect to a repository on a CVS server. There’s a large number of CVS repositories at sourceforge.net. I happened to choose nxtOSEK, an RTOS for the Lego Mindstorm NXT, as my sample project, but feel free to select whatever strikes your fancy at SourceForge, or anywhere else for that matter. nxtOSEK is found at http://sourceforge.net/projects/lejos-osek.
In a web browser, go to that page, or the page for your selected project, and scroll down until you find a link to the CVS Repository. Upon clicking the link you’ll see some basic information about CVS and about anonymous access. There you’ll see a command line, something like:
cvs –d:pserver:[email protected]:/cvsroot/lejos-osek login
Note that this is in fact one line.
This tells us the following:
• The repository uses the CVS protocol pserver.
• The user login name is anonymous with no password.
• The server name is lejos-osek.cvs.sourceforge.net.
• The root path to the project is cvsroot/lejos-osek.
This is enough information to get Eclipse to connect to the project. Right-click in the CVS Repositories view and select New? Repository Location…. Fill out the resulting dialog, as shown in Figure 8.19. The User: field is a drop-down menu whose only entry is anonymous.

Figure 8.19: Add Repository dialog.
Click Finish. You’ll find a new entry in the CVS Repositories view. Expand that to look like Figure 8.20. Each time you expand an entry by clicking on the right arrow, Eclipse goes out to the server to retrieve the information for that directory.
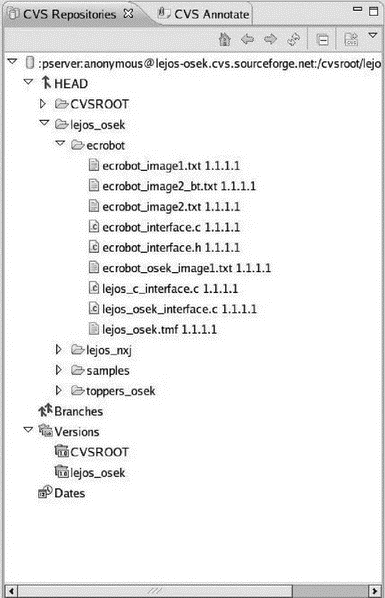
Figure 8.20: CVS Repositories view.
Right-click one of the file entries under the ecrobot directory and select Show History. The History view (Figure 8.21) now shows the full history of this file including author, timestamp, comments, and so on. You may have to expand the Older than This Month entry to see the history. There’s not much here, but it gives you the idea.
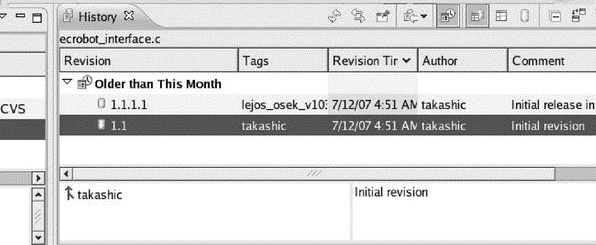
Figure 8.21: CVS History view.
Other items in the CVS Repositories view context menu include Show Annotation and Open, both of which retrieve the file from the repository and open it in a read-only editor window.
Having connected to a repository, we might want to check out some or all of the contents to work on locally. Right-click the ecrobot entry again and select Check Out. Eclipse retrieves all the files in ecrobot and creates a new project of the same name in the default workspace. The Console view shows the CVS commands and responses.
Go back to the C/C++ perspective and you’ll see that the ecrobot project is identified as having come from a CVS repository. All the files have their version number listed, and are identified as ASCII files.
Select Properties from the context menu for ecrobot. There’s a section called CVS shown in Figure 8.22. This lists all the properties of the repository from which the project came. You can now edit the files in the local project.
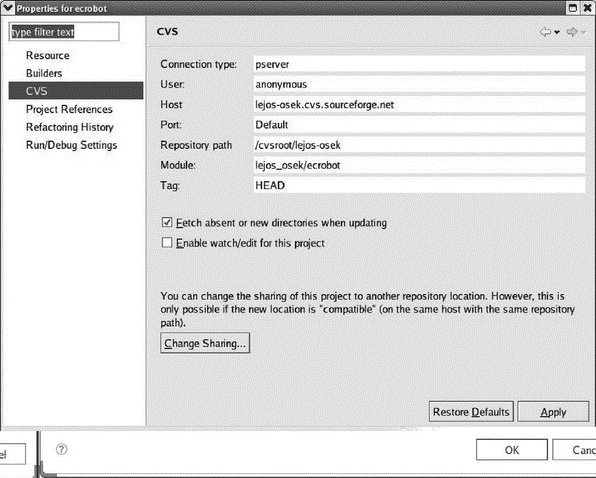
Figure 8.22: Project CVS properties.
The next thing we might want to do is create a branch where we can safely share the project files with other team members, and make changes until we’re ready to check them back into HEAD. The branch is created on the repository server and requires write access, which anonymous users normally don’t have.
- 8.2.3 Setting Up a CVS server
- 6.1 Adding on to Eclipse
- CHAPTER 1 Introducing Eclipse
- 8.1.6 Configuring EclipseUML
- 1.5 What Can You Do With Eclipse?
- 5.4.5 Creating a Target Eclipse Project
- 8.1.1 Installing Omondo EclipseUML
- CHAPTER 5 Eclipse CDT — Digging Deeper
- CHAPTER 8 Eclipse Advanced Features
- CHAPTER 9 Eclipse-Based Development Products
- APPENDIX A The Eclipse Public License
- 1.3 Status of Eclipse
