Книга: Fedora™ Unleashed, 2008 edition
Firstboot Configuration
Firstboot Configuration
Although the vast majority of configuration is done during the actual installation, Fedora allows you to choose some more options before you log in for the first time. When you boot Fedora, it loads firstboot, which is the utility responsible for personalizing your computer. It asks you a few straightforward questions and the end result is that you are able to log in to Fedora.
The first screen welcomes you to firstboot and you should click Next to start. The next screen asks whether you accept the conditions under which Fedora is released. If you agree with what is said, click the Yes button and then click Next.
NOTE
To read the end-user licensing agreement for Fedora, go to http://fedoraproject.org/wiki/Legal/Licenses/EULA.
Firewall configuration is up next (see Figure 1.26), and you should always have your fire wall enabled. Sensibly, Fedora defaults to this, but it also asks you whether you want to allow access to specific ports to allow services to run. Depending on your requirements, you might want to select one or more of the boxes. You can also enter in specific ports and the protocol (TCP or UDP), although you should be aware that the more services or ports you allow access to, the less secure your system becomes as it opens up more opportunities for attack.
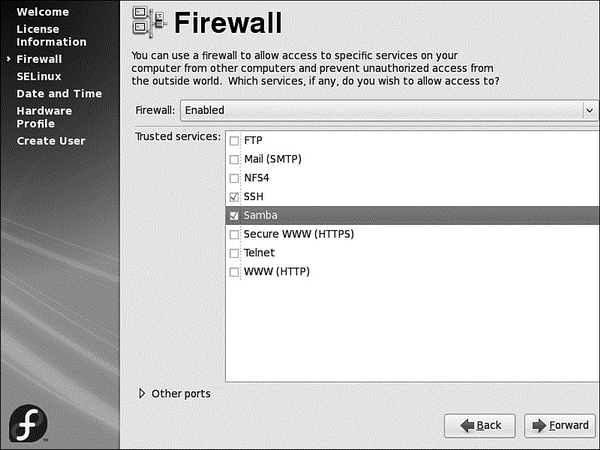
FIGURE 1.26 The firewall is a key part of your defense against would-be crackers. When you are happy with your selection, click the Next button to start configuring SELinux.
SELinux allows a much more detailed security policy, and is still in development. Introduced in Fedora Core 2, SELinux is an NSA initiative to provide Linux with an in-depth mandatory access control system that compartmentalizes the system. Basically, if an intruder gets onto the system, SELinux limits the amount of damage that the intruder can cause.
SELinux
As mentioned earlier, SELinux came from the NSA (National Security Agency), one of the most secret organizations in the United States. The community's shock at having this technology released to them can be summed up by Larry Loeb when he said, "Let me assure you that this action by the NSA was the crypto-equivalent of the pope coming down off the balcony in Rome, working the crowd with a few loaves of bread and some fish, and then inviting everyone to come over to his place to watch the soccer game and have a few beers. There are some things that one just never expects to see, and the NSA handing out source code along with details of the security mechanism behind it was right up there on that list."
You are able to choose how SELinux is implemented on your system, but unless you have a specific reason to change any of the default settings, just click the Next button to continue. The default settings provide a very secure system.
Following on from SELinux, Fedora gives you a chance to set up your Time and Date settings. You already gave Fedora your location in the world, but this screen (see Figure 1.27) enables you to fine-tune your time and date and to opt to use the Network Time Protocol and get an accurate time from one of the many hundreds of time servers across the world.
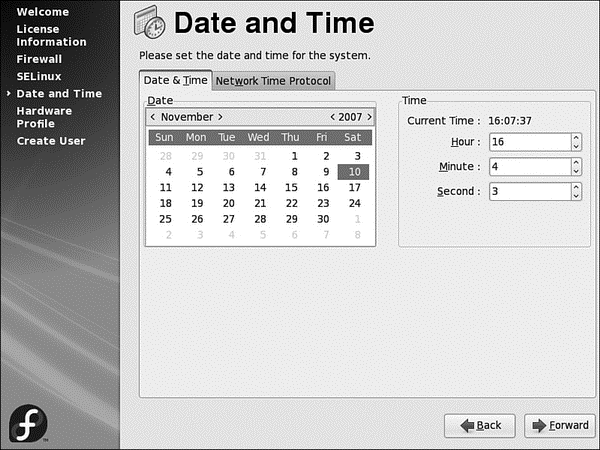
FIGURE 1.27 Never be late again by setting your system clock correctly.
After the Time and Date settings comes your chance to actively contribute to Fedora's development. Smolt (see Figure 1.28) was designed to gather information about your hardware configuration so that the Fedora Project could build up a database of known working hardware configurations. It enables the Fedora Project to analyze on what kinds of systems Fedora is being used, and also enables them to prioritize development on specific platforms. If you have a network connection, we recommend that you take part. No personal details will be sent as part of Smolt's submission, and you will be helping in the future development of Fedora.
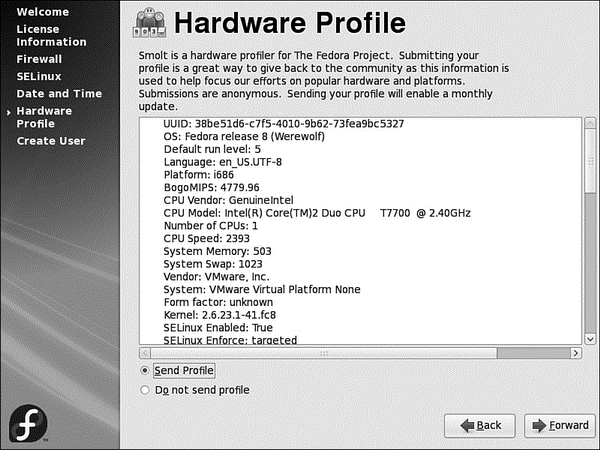
FIGURE 1.28 Help Fedora by submitting information about your hardware.
Clicking Next takes you to the Add New User screen (see Figure 1.29) and allows you to enter details for one user initially. You can enter the user's full name, username, and password (which you need to enter again to confirm), and you can choose any other authentication settings such as use of Kerberos or NIS services. When you have completed firstboot, you can create other users, using the system-config-users utility.
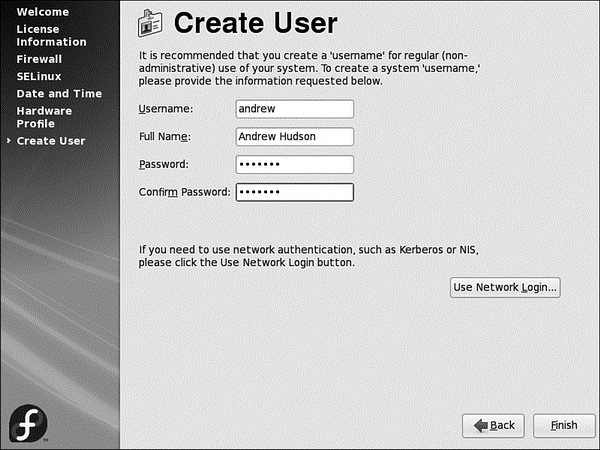
FIGURE 1.29 Add your first user in this screen.
Finally, click the Finish button to go straight to the login prompt, as shown in Figure 1.30. Here you should log in as the user you created during firstboot; do not log in as root because you can cause some serious damage if you do not know what you are doing.
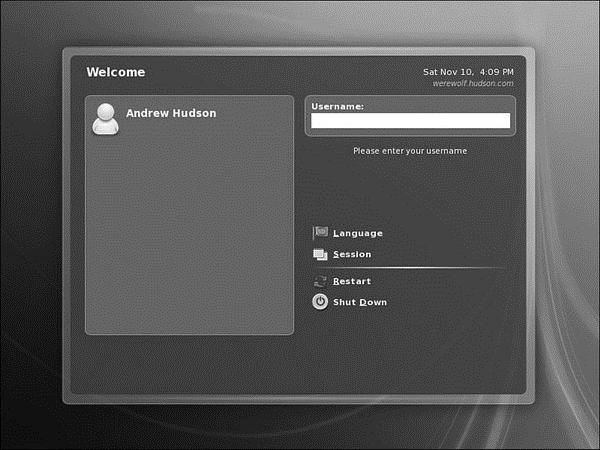
FIGURE 1.30 Enter your username and password to log in to Fedora.
- Network Configuration
- Graphic Interface Configuration of Apache
- 9.9.1 Configuration Mode
- 5.4.3 Host Configuration
- Configuration options
- GUI-Based Printer Configuration Quick Start
- Using Network Configuration Tools
- Using Graphical Configuration Tools
- Command-Line Network Interface Configuration
- Network Configuration Files
- Dynamic Host Configuration Protocol
- Common Configuration Information


