Книга: Embedded Linux development using Eclipse
8.1.3 Use Case Diagram
8.1.3 Use Case Diagram
The first UML diagram we’ll tackle is the use case. The role of the use case is to describe how an actor interacts with the system. It provides a generalized description of how the system will be used. In this case the actor is a passenger desiring to use the elevator.
The elevator system goes through a process something like this:
1. Passenger presses up or down button. Button illuminates.
2. Elevator detects button pressed and moves to passenger’s floor.
3. Doors open. Up/down button illumination turns off.
4. Passenger gets in and presses a floor button. Button illuminates.
5. Doors close.
6. Elevator moves to destination floor.
7. Doors open. Floor button illumination turns off.
8. Passenger gets out. Doors close.
Right-click on the elevator package and select New UML Diagram?UML Use Case Diagram. The suggested file name is elevatorUseCaseDiagram.uud. I chose to delete the elevator part. Select the models/ directory and click Finish to bring up the Use Case editor. Figure 8.3 shows the editor’s toolbar. The icons, starting from the left, are:
• Selection mode
• Zoom mode
• Create an actor
• Create a use case
• Create a system
• Add a generalization
• Add an includes
• Add an extends
• Add an association
• Create a package
• Create an indication
• Create a note
• Create a diagram link
• Create a text label
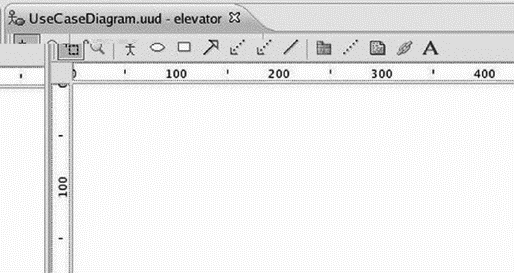
Figure 8.3: Use Case editor tool bar.
Let’s start by creating an actor. Click the Create an actor icon to bring up the Create an actor dialog. Name it “passenger.” The New Stereotype button in the dialog is a way of clarifying the role of the actor. For now, leave it blank. Click OK and the passenger shows up in the editor window (Figure 8.4).
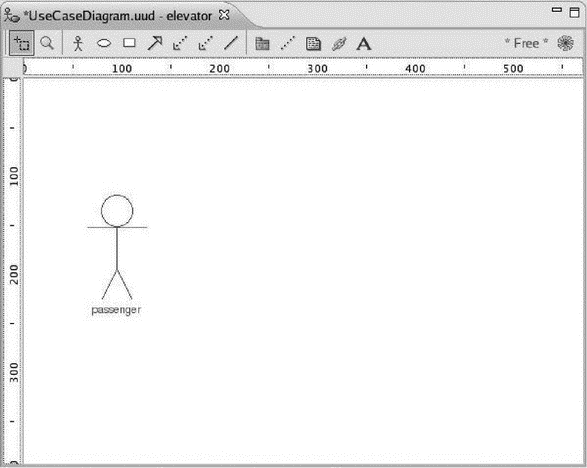
Figure 8.4: The passenger actor.
Next, let’s add a use case. Click Create a use case and name it “Press up/down button.” The use case dialog contains five tabs, the first four of which take free-form text input. In the Properties tab, Abstract means a use case is not complete, but depends on other use cases. Pre condition is the system state before the use case is called, and Post condition is its state after this use case is called (Figure 8.5).
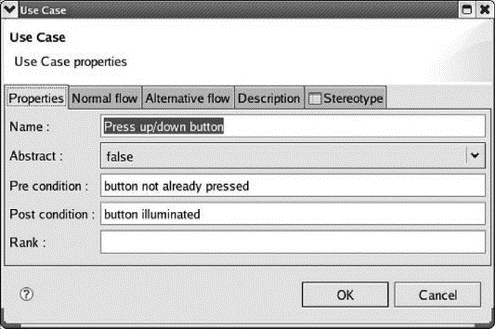
Figure 8.5: New use case dialog.
The Normal flow tab is where you describe how the system responds when the use case succeeds. In this case, two activities happen:
• Button illuminates.
• Elevator moves to passenger’s floor.
Alternative flow is what happens if something fails. Off hand, I can’t think of any actions for that circumstance. Description is just additional explanatory text that doesn’t fit the other tabs.
The actor and the use case now need to be associated. Click the Add an association icon, then click both the passenger actor and the Press up/down button use case.
You can optionally give the association a Label. Our use case diagram now looks like Figure 8.6.
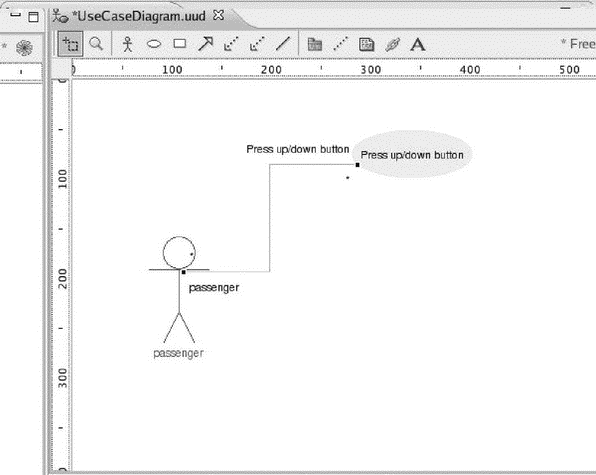
Figure 8.6: passenger and Press up/down use case.
We need one more use case for our passenger: “Press floor button.” I suggest that the Pre condition is that “doors are open” since the passenger can’t push the button until he gets in the elevator. The Post condition is “floor button illuminated.” The normal flow is:
1. Illuminate floor button.
2. Close doors.
3. Move to destination floor.
Create an association between the passenger and the Press floor button case. Finally, we should encapsulate our use cases inside a system. Click the Create a system button and drag the cursor to create a box around the two use cases. Name it “Elevator.” Oddly, the two use case ovals end up outside the system box, so drag them back into it. Figure 8.7 shows the completed diagram. Save it.
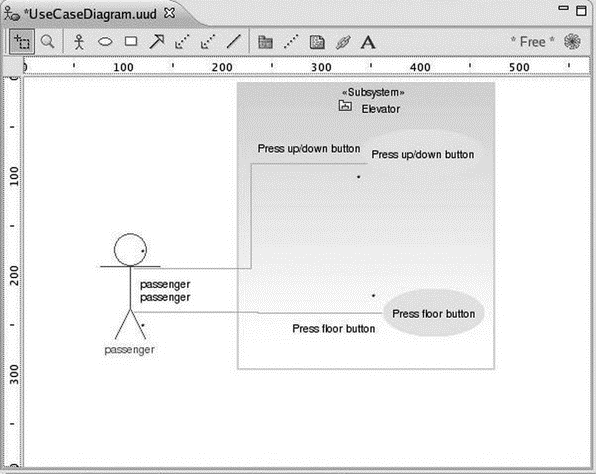
Figure 8.7: Completed use case diagram.
The information you entered into the use case diagram, as well as other diagrams, can be turned into design documentation. Unfortunately, that feature is not supported in the free version of EclipseUML.
- Conventions used in this document
- Chapter 15. Graphical User Interfaces for Iptables
- Terms used in this document
- What NAT is used for and basic terms and expressions
- Раздел uses
- User-land setup
- Compiling the user-land applications
- User specified chains
- User-land states
- System tools used for debugging
- Setting up user specified chains in the filter table
- Internet Service Providers who use assigned IP addresses


