Книга: Embedded Linux development using Eclipse
8.1.4 Class Diagram
8.1.4 Class Diagram
A system, or domain, is composed of classes and the relationships among them. The class diagram depicts these relationships and provides an overview of the domain. EclipseUML lets you define a domain model without getting bogged down in the details of creating classes, interfaces, and relationships. Wizards help you build the diagram incrementally until you have enough information to adequately describe the problem domain.
For illustration purposes, let’s say our elevator has the following classes:
• Elevator. The thing that actually moves up and down carrying passengers. The elevator has a current position that might be expressed either as a floor or as an elevation in feet. It can be directed to move up or down from its current position.
• Door. The elevator has a door that can be commanded to open or close.
• Up/Down button. Each floor has a pair of these buttons, except for the top and bottom floors. The button state can be pressed or not pressed, and it can either be illuminated or not illuminated.
• Floor button. The elevator has a set of buttons, one for each floor. Like the Up/Down buttons, these can be pressed or not pressed, illuminated or not illuminated.
• Controller. This class ties all the others together by controlling the elevator and door in response to button presses by passengers.
Right-click the elevator package in the Package Explorer view and select New UML Diagram?UML Class Diagram. Change the parent folder to elevator/models/ and if you choose, delete “elevator” from the file name. The Class Diagram editor toolbar is shown in Figure 8.8. The first two icons are Selection mode and Zoom mode, as in the Use Case editor. The remaining icons are:
• Create a package
• Create a class: drop down menu
• Create an interface
• Create an enumeration
• Association: drop down menu
• Dependency: drop down menu
• Generalization
• Realization: drop down menu
• Create an Element Import: drop down menu
• Create an interface provider
• Create a require interface
• Create an interface connection
• Create a note: drop down menu
• Create an indication

Figure 8.8: Class Diagram editor tool bar.
Click Create a class and then click somewhere in the top center of the editor. This brings up the New Java Class dialog. Name the class “Controller” and leave everything else as defaults. Click Finish. A class symbol shows up on the diagram. In the Package Explorer view a Java file, Controller.java, shows up under the elevator package.
Repeat this process for the following classes:
• Elevator
• Door
• UpDownButton
• FloorButton
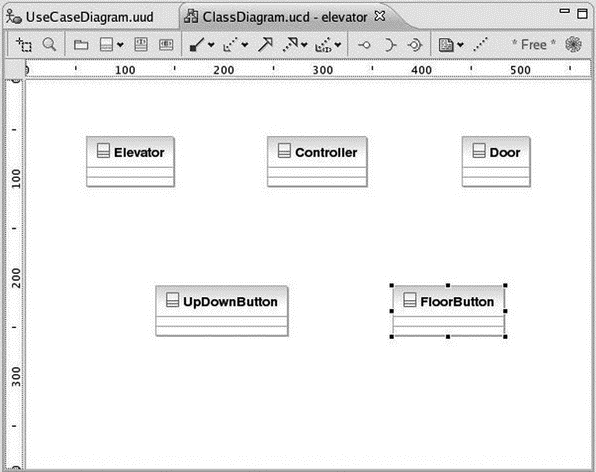
The result should look something like Figure 8.9.

Figure 8.9: Class diagram.
Take a quick look at Controller.java. Not much there, just a stub for the Controller class. But as we add items to the class diagram, the template code will be expanded to remain in sync with the diagram.
Now that we have the classes, we need to figure out how they interact. Let’s start by creating a pair of directed associations between the Controller and the two button classes. From the Association drop-down menu, select Directed Association. Then click on the Controller class. The cursor changes to a plug, implying that we’re “plugging” the Controller class into something else. Now click on the UpDownButton class.
A pair of methods show up in the Controller box — getUpDownButton() and setUpDownButton(). This seems reasonable. We want to get the state of the buttons and in turn set the illumination state. Do the same thing with the FloorButton class. Our class diagram now resembles Figure 8.10.

Figure 8.10: Class diagram with associations.
It might be equally useful to create directed associations with the Elevator and Door. Instead, I encourage you to investigate the other associations and connection mechanisms, to see how EclipseUML treats them. And of course, unless you’re a Java programmer with some knowledge of UML, they may not make much sense just yet.
- 8.1.5 Sequence Diagram
- InterBase Classic Server под Linux
- Каталог BIN в InterBase Classic Server для Linux
- Classic
- Classic vs SuperServer
- Рекомендации по выбору архитектуры: Classic или SuperServer?
- Эффективное взаимодействие процессов архитектуры Classic Server
- Yaffil Classic Server - замена InterBase Classic 4.0
- SERVER PRIORITY CLASS
- CLASSIFY target
- Abstract Class
- Class and Object Variables


