Книга: Mastering VMware® Infrastructure3
Performing Cold Migrations
Performing Cold Migrations
The process referred to as a cold migration involves the conversion of a physical machine to a virtual machine while the physical machine is not in a running state. This type of conversion is best for servers that have constantly changing data sets. For example, computers that run SQL Server or Exchange Server are good candidates for cold migrations. The downside is that the server must be taken offline as part of a planned outage. Cold migrations are preferable for database and mail servers because the hot migration does not continuously update as the conversion is in progress. Therefore, if a hot migration begins at 9:00 ~PM, the virtual machine would be consistent as of that time. Any updates since the 9:00 ~PM start time would not be captured in the virtual machine.
Naturally, a computer cannot be migrated while powered off completely, so the cold migration is not about migrating a physical computer that is powered off. Rather, it is the migration of a physical computer not booted into the standard default operating system. The cold clone process begins by booting the computer from the CD/DVD-ROM drive with the VMware Converter boot CD installed. You can download the VMware Converter boot CD from VMware's website and then burn it to CD or DVD media.
The target physical computer must be configured with more than 264 MB of RAM to perform a cold migration or an error will be thrown, as shown in Figure 7.23.
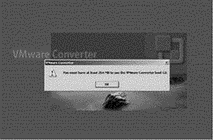
Figure 7.23 Target machines to be converted to virtual machines must be configured with more than 264 MB of RAM.
Perform the following steps to cold-migrate a physical computer into a virtual machine:
1. Boot the target computer from the VMware Converter boot CD.
2. Click the I Accept the Terms in the License Agreement radio button and then click OK.
3. If the target computer has less than 364 MB of RAM, a warning message, shown in Figure 7.24, will be thrown. If the target computer has more than 364 MB of RAM, skip to step 4.

Figure 7.24 The VMware Converter will suggest using a temporary directory for target machines with less than 364 MB of RAM.
Click the Yes button to edit the network configuration, as shown in Figure 7.25. This is just a suggestion by the VMware Converter and does not have to be done.
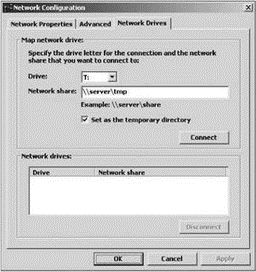
Figure 7.25 A mapped network drive can serve as the temporary directory used by the VMware Converter.
4. After accepting the license agreement, you will be prompted to update the network parameters. Click the Yes button to adjust the network properties shown in Figure 7.26.
5. Click OK once the network properties are adjusted as needed.
6. The VMware Converter window will open. Click the Import Machine button to launch the VMware Converter Import Wizard.
7. Click Next.
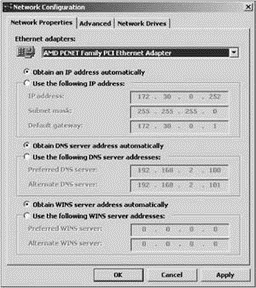
Figure 7.26 The network properties of the target system can be adjusted as part of the cold clone process.
8. On the Source Data page of the wizard, select either the Import all disks and maintain size option or the Select volumes and resize to save or add space option, as shown in Figure 7.27. Use the latter option to increase or decrease the amount of space on the volume. Figure 7.27 shows an increase in size on volume C: from 1.99GB to 10GB.
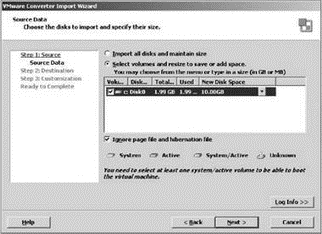
Figure 7.27 The cold clone process allows for increasing or decreasing the space allocated to converted volumes.
9. Once the volumes have been resized as needed, click Next to continue.
10. On the Destination Type page, select the destination for the import. For enterprise physical-to-virtual migrations, the VMware ESX Server or VirtualCenter virtual machine option, shown in Figure 7.28, will be the most appropriate. Click Next.
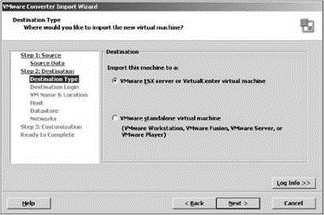
Figure 7.28 The VMware Converter Import Wizard offers destinations of ESX Server, VirtualCenter, Workstation, Fusion, and Server.
11. On the Destination Login page, provide the name or IP address of the ESX Server or Virtual-Center Server and the appropriate credentials to authenticate, as shown in Figure 7.29. Click Next.
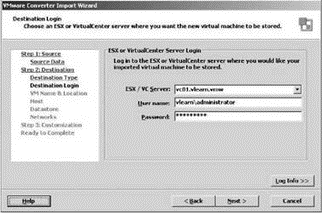
Figure 7.29 Identification and authentication of the destination server require name resolution or the use of an IP address.
12. On the Virtual Machine Name and Folder page, type a display name for the virtual machine and select the desired location in the VirtualCenter inventory. Click Next.
13. On the Host or Cluster page, select the host, cluster, or resource pool under which the virtual machine will run, as shown in Figure 7.30. Click Next.
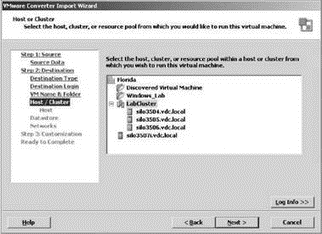
Figure 7.30 Migrated virtual machines can be placed under a host, cluster, or resource pool.
If a cluster is selected from the inventory list, the next page in the wizard will require the selection of a specific host. If a host is selected, the wizard will move on to the Datastore page.
14. On the Datastore page, select the datastore where the virtual machine disk files will be stored. Use the Advanced button to supply unique datastores for the different virtual machine disk files. Click Next.
15. On the Networks page, select the number of network adapters to include in the new virtual machine, and then select the virtual machine network that each network adapter should be connected to. Click Next.
16. On the Customization page, select the check box Install VMware Tools. If you want to change the identity of the virtual machine to be different from the target system, select the check box Customize the Identity of the Virtual Machine. Selecting this option adds the following pages to the VMware Converter Import Wizard:
? Computer Info
? Windows License
? Time Zone
? Network Settings
? Workgroup/Domain
17. Click Next to continue.
18. On the Ready to Complete page, select the check box Power On the Virtual Machine after Creation and then click the Finish button. The cold clone process will be detailed in the VMware Converter utility, as shown in Figure 7.31.
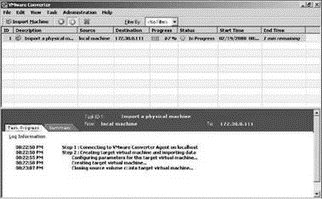
Figure 7.31 The VMware Converter provides detailed information about the progress of the cold migration process.
P2V or V2V One and the Same
While all of the samples here discuss the use of the VMware Converter to perform physical-to-virtual migrations, the tool can also be used to perform virtual-to-virtual migrations.
This can be a powerful utility for solving problems regarding the over- or under-allocation of disk space for a virtual machine. By using the VMware Converter, as you have seen in this chapter, the amount of space allocated to a volume can be decreased or increased as needed. This allows administrators to use a nondestructive process to easily manage volume sizes in Windows virtual machines. Typically, doing this requires costly third-party tools and can incur damage to the system if not done properly.
