Книга: Embedded Linux development using Eclipse
SSH Connection
SSH Connection
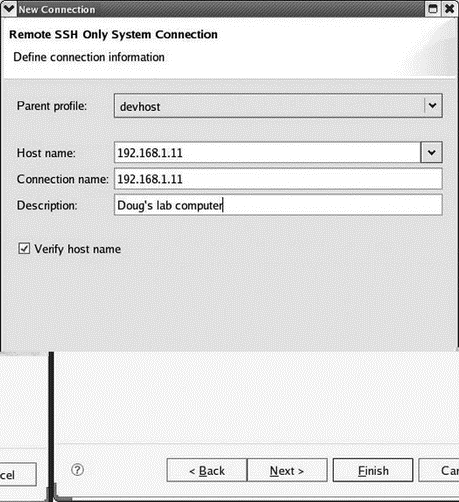
In the Remote Systems view, click the Define a connection icon or right-click on Local and select New?Connection…. The first step is to select the Remote System Type. Select SSH Only and click Next. The next screen (Figure 6.6) initially displays LOCALHOST as the Host name. Change that either to an IP address or to the name of a computer on your network. The Connection name defaults to the Host name, but you can change it to anything you want.

Figure 6.6: Setting up an SSH connection.
Clicking Next shows the file services available on the remote machine. Clicking Next again shows the available shell services. One final click on Next shows the available terminal services. Click Finish and the new connection shows up in the Remote Systems view. Incidentally, the SSH daemon must be running on the remote system. Most Linux distributions start it at boot time.
Expand the new connection to reveal entries similar to what we saw with Local. When you expand My Home or Root under Sftp Files, you’re required to enter a valid user ID and password for the remote system, which effectively logs you into it. You can now use copy and paste commands to move files between your local host and the remote system. Give it a try.
There’s an option to save the user ID and password as defaults, so you don’t have to enter them every time.
Right-click on Ssh Shells and select Launch Shell. You now have a command shell connected to the remote machine. You can also right-click any directory entry in the remote file system and launch a shell in that directory. This allows for multiple shells to the same remote system. These are opened as tabs in the Remote Shell view.
Right-click a text file in the remote system and select Open. The file is opened in the Eclipse editor.
- The SSH Tools
- The ssh daemon
- Using ssh
- Creating a Second Connection
- Системные переменные ROWS_AFFECTED, GDSCODE, SQLCODE, TRANSACTIONJD, CONNECTIONJD
- CONNECTION TIMEOUT
- TCP connections
- UDP connections
- ICMP connections
- Default connections
- Untracked connections and the raw table
- Complex protocols and connection tracking


