Книга: Beginning Android
Flipping Them Off
Flipping Them Off
Sometimes, you want the overall effect of tabs (only some Views visible at a time), but you do not want the actual UI implementation of tabs. Maybe the tabs take up too much screen space. Maybe you want to switch between perspectives based on a gesture or a device shake. Or maybe you just like being different.
The good news is that the guts of the view-flipping logic from tabs can be found in the ViewFlipper container, which can be used in other ways than the traditional tab.
ViewFlipper inherits from FrameLayout, just like we used to describe the innards of a TabWidget. However, initially, it just shows the first child view. It is up to you to arrange for the views to flip, either manually by user interaction, or automatically via a timer.
For example, here is a layout for a simple activity (Fancy/Flipper1) using a Button and a ViewFlipper:
<?xml version="1.0" encoding="utf-8"?>

<LinearLayout xmlns:android="http://schemas.android.com/apk/res/android"

 android:orientation="vertical"

 android:layout_width="fill_parent"

 android:layout_height="fill_parent"

 >

 <Button android:id="@+id/flip_me"

  android:layout_width="fill_parent"

  android:layout_height="wrap_content"

  android:text="Flip Me!"

 />

 <ViewFlipper android:id="@+id/details"

  android:layout_width="fill_parent"

  android:layout_height="fill_parent"

 >

  <TextView

   android:layout_width="fill_parent"

   android:layout_height="wrap_content"

   android:textStyle="bold"

   android:textColor="#FF00FF00"

   android:text="This is the first panel"

  />

  <TextView

   android:layout_width="fill_parent"

   android:layout_height="wrap_content"

   android:textStyle="bold"

   android:textColor="#FFFF0000"

   android:text="This is the second panel"

  />

  <TextView

   android:layout_width="fill_parent"

   android:layout_height="wrap_content"

   android:textStyle="bold"

   android:textColor="#FFFFFF00"

   android:text="This is the third panel"

  />

 </ViewFlipper>

</LinearLayout>
Notice that the layout defines three child views for the ViewFlipper, each a TextView with a simple message. Of course, you could have very complicated child views, if you so chose.
To manually flip the views, we need to hook into the Button and flip them ourselves when the button is clicked:
public class FlipperDemo extends Activity {

 ViewFlipper flipper;

 @Override

 public void onCreate(Bundle icicle) {

  super.onCreate(icicle);

  setContentView(R.layout.main);

  flipper = (ViewFlipper)findViewById(R.id.details);

  Button btn = (Button)findViewById(R.id.flip_me);

  btn.setOnClickListener(new View.OnClickListener() {

   public void onClick(View view) {

    flipper.showNext();

   }

  });

 }

}
This is just a matter of calling showNext() on the ViewFlipper, like you can on any ViewAnimator class.
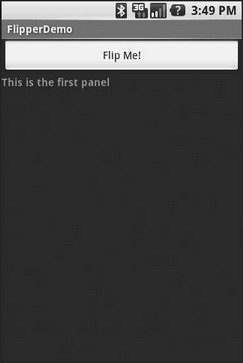
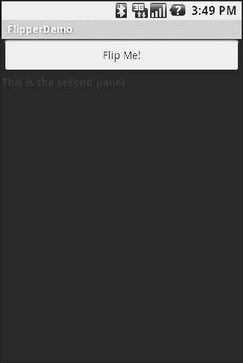
The result is a trivial activity: click the button, and the next TextView in sequence is displayed, wrapping around to the first after viewing the last (see Figures 10-9 and 10-10).

Figure 10-9. The Flipper1 application, showing the first panel

Figure 10-10. The same application, after switching to the second panel
This, of course, could be handled more simply by having a single TextView and changing the text and color on each click. However, you can imagine that the ViewFlipper contents could be much more complicated, like the contents you might put into a TabView.
As with the TabWidget, sometimes, your ViewFlipper contents may not be known at compile time. As with TabWidget, though, you can add new contents on the fly with ease.
For example, let’s look at another sample activity (Fancy/Flipper2), using this layout:
<?xml version="1.0" encoding="utf-8"?>

<LinearLayout xmlns:android="http://schemas.android.com/apk/res/android"

 android:orientation="vertical"

 android:layout_width="fill_parent"

 android:layout_height="fill_parent"

>

 <ViewFlipper android:id="@+id/details"

  android:layout_width="fill_parent"

  android:layout_height="fill_parent"

 >

 </ViewFlipper>

</LinearLayout>
Notice that the ViewFlipper has no contents at compile time. Also note that there is no Button for flipping between the contents — more on this in a moment.
For the ViewFlipper contents, we will create large Button widgets, each containing one of a set of random words. And, we will set up the ViewFlipper to automatically rotate between the Button widgets, using an animation for transition:
public class FlipperDemo2 extends Activity {

 static String[] items={"lorem", "ipsum", "dolor", "sit", "amet",

  "consectetuer", "adipiscing", "elit",

  "morbi", "vel", "ligula", "vitae",

  "arcu", "aliquet", "mollis", "etiam",

  "vel", "erat", "placerat", "ante",

  "porttitor", "sodales", "pellentesque",

  "augue", "purus"};

 ViewFlipper flipper;

 @Override

 public void onCreate(Bundle icicle) {

  super.onCreate(icicle);

  setContentView(R.layout.main);

  flipper = (ViewFlipper)findViewById(R.id.details);

  flipper.setInAnimation(AnimationUtils.loadAnimation(this,

   R.anim.push_left_in));

  flipper.setOutAnimation(AnimationUtils.loadAnimation(this,

   R.anim.push_left_out));

  for (String item : items) {

   Button btn = new Button(this);

   btn.setText(item);

   flipper.addView(btn,

    new ViewGroup.LayoutParams(

     ViewGroup.LayoutParams.FILL_PARENT,

     ViewGroup.LayoutParams.FILL_PARENT));

  }

  flipper.setFlipInterval(2000);

  flipper.startFlipping();

 }

}
After getting our ViewFlipper widget from the layout, we first set up the “in” and “out” animations. In Android terms, an animation is a description of how a widget leaves (”out”) or enters (”in”) the viewable area. Animations are a complex beast, eventually worthy of their own chapter but not covered in this text. For now, realize that animations are resources, stored in res/anim/ in your project. For this example, we are using a pair of animations supplied by the SDK samples, available under the Apache 2.0 License. As their names suggest, widgets are “pushed” to the left, either to enter or leave the viewable area.
After iterating over the funky words, turning each into a Button, and adding the Button as a child of the ViewFlipper, we set up the flipper to automatically flip between children (flipper.setFlipInterval(2000);) and to start flipping (flipper.startFlipping();).
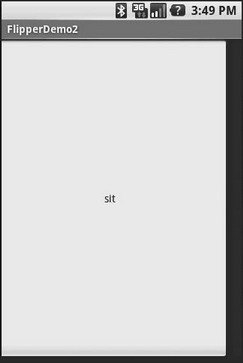
The result is an endless series of buttons, each appearing, then sliding out to the left after 2 seconds, being replaced by the next button in sequence, wrapping around to the first after the last has been shown (see Figure 10-11).

Figure 10-11. The Flipper2 application, showing an animated transition
The auto-flipping ViewFlipper is useful for status panels or other situations where you have a lot of information to display, but not much room. The key is that, since it automatically flips between views, expecting users to interact with individual views is dicey — the view might switch away part-way through their interaction.
- Интеграция Windows SharePoint и Microsoft Office
- Извлечение и возврат документов в приложениях Microsoft Office 2007
- Создание рабочих областей для документов из приложений Microsoft Office 2007
- Использование панели задач Управление документами в приложениях Office 2007
- Часть III Пакет Microsoft Office
- Как восстановить поврежденный файл Office
- Я что-то напутал с настройками Microsoft Office, неужели теперь все переустанавливать?
- Справочная система приложений Office
- Them's Funky People
- Office Suite
- What Is in OpenOffice.org?
- Installing and Configuring OpenOffice.org


