Книга: Mastering VMware® Infrastructure3
CD-ROM-Based Installation
Разделы на этой странице:
CD-ROM-Based Installation
Readers who have already done ESX Server installs are probably wondering what we could be talking about in this section given that the installation can be completed by simply clicking Next until the Finish button shows up. And though this is true, there are some significant decisions to be made through the installation — decisions that affect the future of the ESX Server deployment as well as decisions that could cause severe damage to company data. For this reason, it is important for the experienced administrator and the installation newbie to read this section carefully and understand how best to install ESX Server to support the current and future demands of the VI3 deployment.
Perform the following steps to install ESX Server 3.5 from a CD:
1. Configure the server to boot from the CD, insert the VMware ESX Server 3.5 CD, and reboot the computer.
2. Select the graphical installation mode by pressing the Enter key at the boot options screen, shown in Figure 2.3.
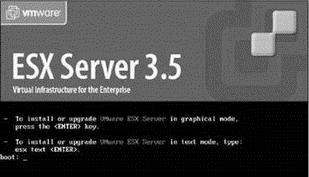
Figure 2.3 ESX Server 3.5 includes a graphical installation mode, which includes an enhanced GUI and a text-based installation mode better suited for installing over a wide area network.
3. At the CD Media Test screen, shown in Figure 2.4, click the Skip button to continue with the installation. Click the Test button to identify any errors in the installation media.
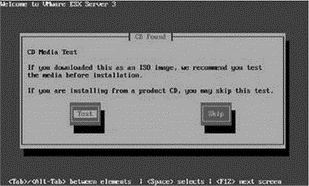
Figure 2.4 To prevent installation errors due to bad media, the CD can be tested early in the install procedure.
4. Click the Next button on the Welcome to the ESX Server 3.5 Installer screen.
5. Select the U.S. English keyboard layout, or whichever is appropriate for your installation, as shown in Figure 2.5. Then click the Next button.
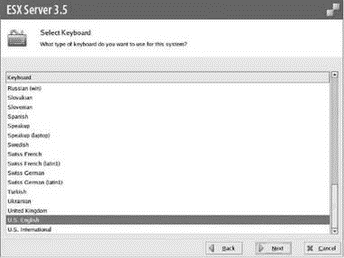
Figure 2.5 ESX Server 3.5 offers support for numerous keyboard layouts.
6. Select the Wheel Mouse (PS/2), shown in Figure 2.6. Or if you choose to match your mouse model exactly, select the appropriate option.
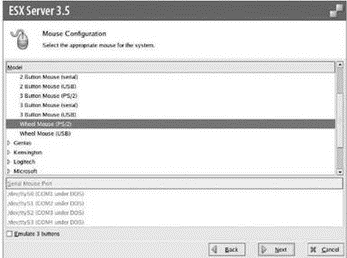
Figure 2.6 ESX Server 3.5 offers support for numerous models of mouse devices.
7. Select the Yes button to initialize any device to be used for storing the ESX Server 3.5 installation partitions, shown in Figure 2.7.
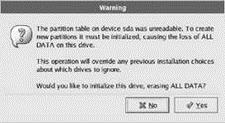
Figure 2.7 Unknown devices must be initialized for ESX Server 3.5 to be installed.
Warning! You Could Lose Data if You Don't Read This…
If SAN storage has already been presented to the server being installed, it could be possible to initialize SAN LUNs with production data. As a precaution, it is an excellent idea to disconnect the server from the SAN or ensure LUN masking has been performed to prevent the server from accessing LUNs.
Access to the SAN is only required during installation if a boot from SAN configuration is required.
8. As shown in Figure 2.8, select the check box labeled I Accept the Terms of the License Agreement and click the Next button.
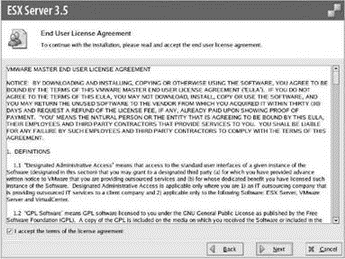
Figure 2.8 The ESX Server 3.5 license agreement must be accepted; however no licenses are configured during the installation wizard.
9. As shown in Figure 2.9, select the Recommended radio button option to allow the installation wizard to automatically partition the local disk. Ensure that the local disk option is selected in the Install ESX Server on the drop-down list. To protect any existing VMFS data, ensure that the Keep Virtual Machines and the VMFS (Virtual Machine File System) That Contains Them option is selected.
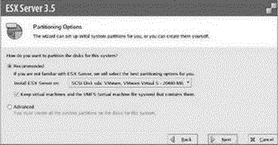
Figure 2.9 The ESX Server 3.5 installation wizard offers automatic partitioning of the selected disk and protection for any existing data that resides in a VMFS-formatted partition.
10. Click the Yes button on the partition removal warning, shown in Figure 2.10.
11. Review the partitioning strategy, as shown in Figure 2.11, and click the Next button to continue the installation.
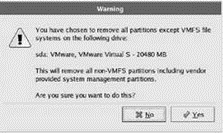
Figure 2.10 The ESX Server 3.5 installation wizard offers a warning before removing all partitions on the selected disk.
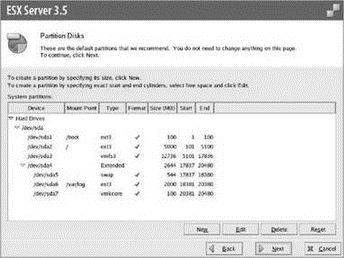
Figure 2.11 ESX Server 3.5 default partitioning provides a configuration that offers successful installation and system operation.
Stray from the Norm
As discussed in the previous section, it might be necessary to alter the default partitioning strategy. This does not mean that all partitions must be built from scratch. To change the default partition strategy, select the partition to change and click the Edit button.
Start the partition customization by reducing the space allocated to the local partition with a type of VMFS 3. Once this partition is reduced, the other partitions — /boot, /swap, and /var/log — can be edited. After these partitions have been reconfigured, any leftover space can be given back to the local VMFS 3 partition and the installation can proceed.
12. Ensure that the ESX Server 3.5 installation wizard has selected to boot from the same drive that was selected for partitioning. By default, the selection should be correct and should not be configurable without selecting the option to allow editing. As shown in Figure 2.12, this screen provides a default configuration consistent with the previous installation configuration. This avoids misconfiguration in which the installation is performed on a local disk but the server is booted from a SAN LUN, or vice versa.
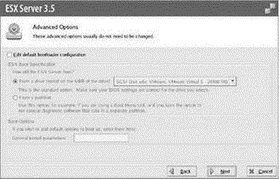
Figure 2.12 An ESX Server 3.5 host should be booted from the same device where the installation partitions have been configured.
13. As shown in Figure 2.13, select the network interface card (NIC) through which the Service Console should communicate. Assign a valid IP address, as well as subnet mask, default gateway, DNS servers, and host name for the ESX Server 3.5 host.
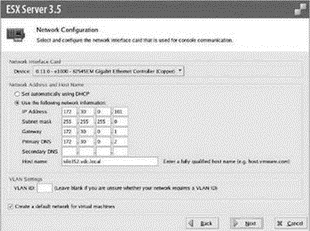
Figure 2.13 A NIC must be selected and configured for Service Console communication over the appropriate physical network.
If the Service Console must communicate over a virtual LAN (VLAN), enter the appropriate VLAN ID in the VLAN Settings text box.
If virtual machines must communicate over the same physical subnet as the Service Console, leave the Create a Default Network for Virtual Machines option selected. The outcome of this option can always be modified during postinstallation configuration. Once the Network Configuration page is configured correctly, click the Next button.
Do I Have to Memorize the PCI Addresses of My NICs?
Although the configuration screen for the Service Console is not very user friendly with respect to identifying the physical NICs in the computer, it is not a big deal to fix the NIC association should the wrong NIC be selected during the installation wizard. As part of the PostInstallation Configuration section of this chapter, we will detail how to recover if the wrong NIC is selected during the installation wizard.
The bright side is that if your hardware remains consistent, then the PCI addresses would also remain consistent. Therefore, company policy could document the PCI address to be selected during any new ESX Server deployments.
Keep in mind that since the NIC was incorrect, access to the server via SSH, web page, or VI Client will fail. The fix to be detailed later in the chapter requires direct access to the console or an out-of-band management tool like Dell's Remote Access Controller, which provides console access from a dedicated Ethernet port.
14. Select the appropriate time zone for the ESX Server host and then click the Next button, as shown in Figure 2.14.
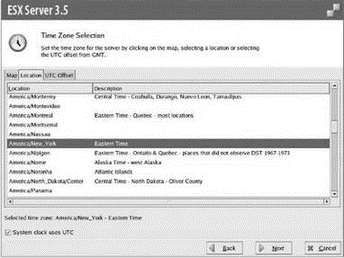
Figure 2.14 ESX Server 3.5 can be configured with one of many time zones from around the world.
15. Set and confirm a root password, as shown in Figure 2.15.
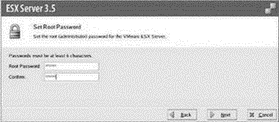
Figure 2.15 Each ESX Server 3.5 host maintains its own root user and password configuration. The password must be at least six characters.
16. Review the installation configuration parameters, as shown in Figure 2.16.
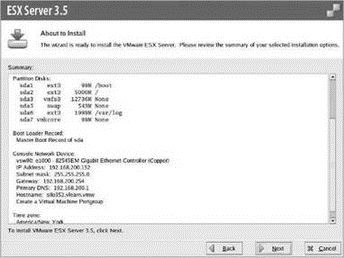
Figure 2.16 The installation review offers a final chance to double-check the server configuration.
If everything looks correct, click the Next button to begin the installation procedure.
17. As shown in Figure 2.17, the installation will begin.
18. As shown in Figure 2.18, click the Finish button to reboot the computer once the installation is complete.
19. During the reboot, the GRUB boot loader will show the boot options, as shown in Figure 2.19. Ensure that the VMware ESX Server option is selected and press the Enter key (or select nothing and the option will be selected by default).
20. Upon completion of the server reboot, the console session will display the information for accessing the server from a remote computer, as shown in Figure 2.20.
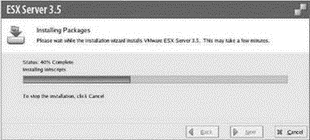
Figure 2.17 Installing ESX Server 3.5
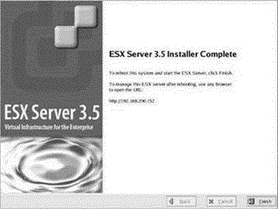
Figure 2.18 The new ESX Server 3.5 host must be rebooted to finalize the installation.
Despite the ease with which ESX Server 3.5 can be installed, it is still not preferable to perform manual, attended installations of a bulk number of servers. Nor is it preferable to perform manual, attended installation in environments that are rapidly deploying new ESX Server hosts. To support large numbers or rapid-deployment scenarios, ESX Server 3.5 can be installed in an unattended fashion.
- Инструкция INSERT INTO ... FROM ... UNION ...
- Chapter 16. Commercial products based on Linux, iptables and netfilter
- Installation on Red Hat 7.1
- 1.2.2 ROM
- Creating CDs from the Command Line
- 7.3.2. EEPROM и флэш-память
- Глава 4. Этаж Promotion
- Как назначить логическому диску или CD-ROM другую букву?
- Я переписал ISO-образ загрузочного диска на CD-RW и выставил в BIOS загрузку с CD-ROM. Но при перезапуске компьютера нач...
- CHAPTER 2 Installation
- Chapter 2. Four Puzzles From Cyberspace
- Before You Begin the Installation
