Книга: Embedded Linux development using Eclipse
7.3.1 Creating a Plug-In Project
7.3.1 Creating a Plug-In Project
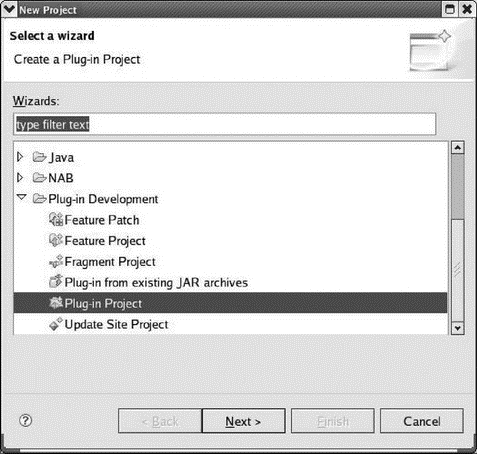
Like every other project, building a plug-in starts by creating a project. Select File?New Project. Find and expand the Plug-in Development category and select Plug-in Project as shown in Figure 7.1.

Figure 7.1: Project selection wizard.
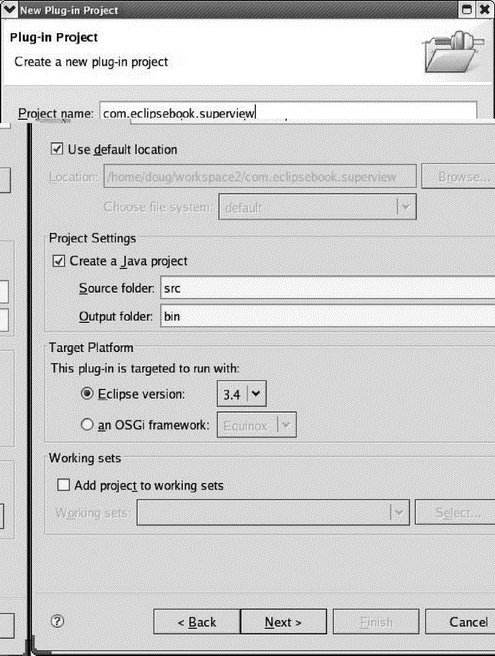
This brings up the dialog shown in Figure 7.2. Again, like every other project, we have to give it a name. In accordance with the Java naming standard, let’s call it com.eclipsebook.superview. There is also an option to choose a target platform, which simply means whether we’re targeting a version of Eclipse, or an OSGi framework like Equinox. In this case, we’ll stick with the 3.4 version of Eclipse to keep things simple.

Figure 7.2: Plug-in new project dialog.
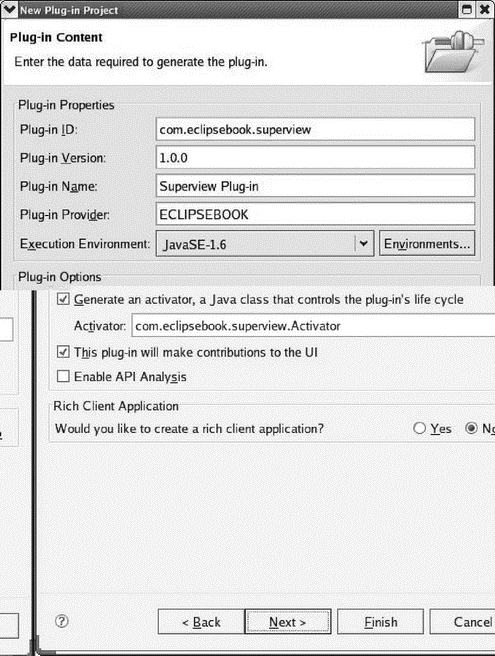
The next screen (Figure 7.3), called Plug-in Content, basically identifies the plug-in in the form of properties, and says something about its content. The properties are structured to make the plug-in compliant with Eclipse. All the default values are suitable.

Figure 7.3: Plug-in Content dialog.
The Plug-in ID represents a unique identifier for your plug-in. No other plug-in can share the same identifier. Note that the default value for the ID is the same as the name we used in the previous screen. The Plug-in Version consists of four segments (three integers and a string) respectively named major.minor.service.qualifier. The Plug-in Name is simply a human-readable name. Likewise, the Plug-in Provider is a human-readable string identifying the author of the plug-in, which defaults to the organization field of the name.
There’s an option to generate a plug-in activator, which is simply a class that controls the life cycle of a plug-in; basically a start and stop method. The activator is usually responsible for setting up things and for properly disposing of resources when the plug-in isn’t needed anymore. We’ll also say here that this plug-in makes contributions to the UI.
Click Finish. If you’re not in the Plug-in Development environment, Eclipse will prompt you to switch to it.
PDE has created a template project for our new plug-in. Views initially visible in the Plug-in Development Perspective include:
• Package Explorer: The Java equivalent of the Project Explorer in CDT. It shows the contents of our new Hello World project.
• Plug-ins: Lists all of the plug-ins presently installed in Eclipse. You can select a plug-in and open it in the…
• Manifest Editor: A form-based multi-page editor that aids in the creation of the plugin.xml and MANIFEST.MF files.
• Outline: As in CDT, this view organizes the information in the Manifest Editor in an easily browsable structure.
- 7.6 Rich Client Platform (RCP)
- 7.3 Our First Plug-In
- Project PDL
- Глава 5. Разработка и анализ бизнес-планов в системе Project Expert
- Turtle Firewall Project
- Creating CDs from the Command Line
- Testing the Project
- Creating and Deleting Device Objects
- Creating a Delegate
- Creating a Root Password and User Accounts
- Creating Users
- Creating CDs and DVDs with Fedora's Graphical Clients


