Книга: Advanced PIC Microcontroller Projects in C
5.3.1 mikroC IDE Screen
Разделы на этой странице:
5.3.1 mikroC IDE Screen
After the mikroC icon is double-clicked to start the IDE, the screen shown in Figure 5.27 is displayed by default.
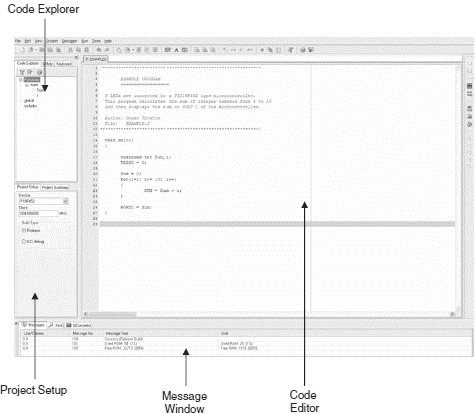
Figure 5.27: mikroC IDE screen
The screen is divided into four areas: the top-left section, the bottom-left section, the middle section, and the bottom section.
Top-Left Section
The top left, the Code Explorer section, displays every declared item in the source code. In the example in Figure 5.28, main is listed under Functions and variables Sum and i are listed under main.
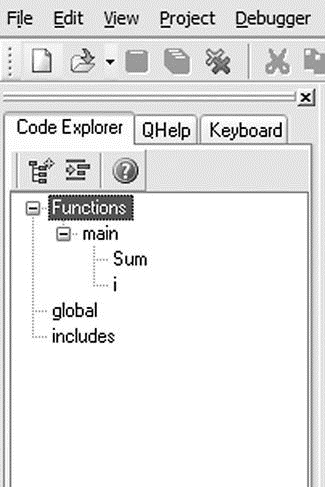
Figure 5.28: Code Explorer form
There are two additional tabs in the Code Explorer. As shown in Figure 5.29, the QHelp tab lists all the available built-in functions and library functions for a quick reference.
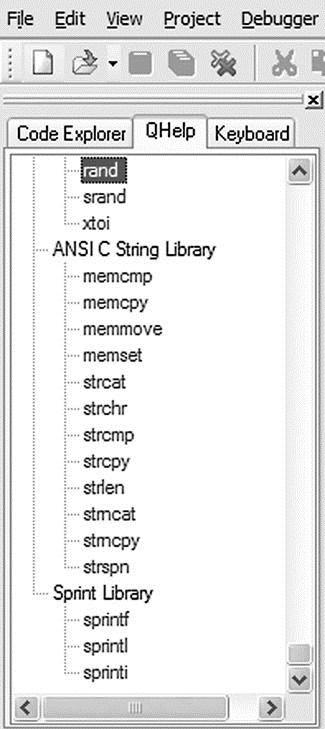
Figure 5.29: QHelp form
The Keyboard tab lists all the available keyboard shortcuts in mikroC IDE (see Figure 5.30).
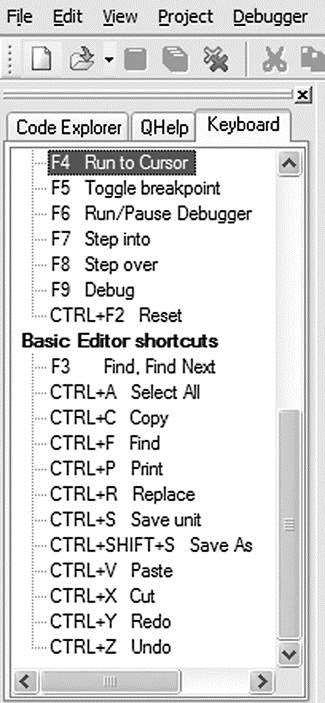
Figure 5.30: Keyboard form
Bottom-Left Section
In the bottom-left section, called Project Setup (see Figure 5.31), the microcontroller device type, clock rate, and build type are specified. The build type can be either Release, which is the normal compiler operating mode, or ICD debug, if the program is to be debugged using the in-circuit debugger.
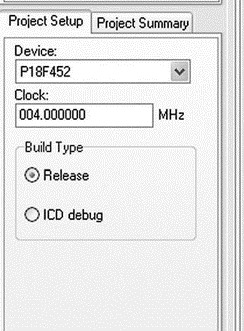
Figure 5.31: Project setup form
The Project Setup section has a tab called Project Summary which lists all the types of files used in the project, as shown in Figure 5.32.
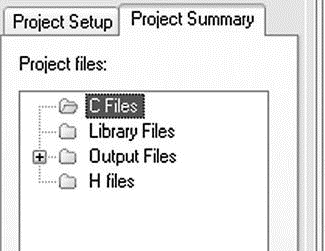
Figure 5.32: Project summary form
Middle Section
The middle section is the Code Editor, an advanced text editor. Programs are written in this section of the screen. The Code Editor supports:
• Code Assistant
• Parameter Assistant
• Code Template
• Auto Correct
• Bookmarks
The Code Assistant is useful when writing a program. Type the first few letters of an identifier and then press the CTRL+SPACE keys to list all valid identifiers beginning with those letters. In Figure 5.33, for example, to locate identifier strlen, the letters str are typed and CTRL+SPACE is pressed. strlen can be selected from the displayed list of matching valid words by using keyboard arrows and pressing ENTER.
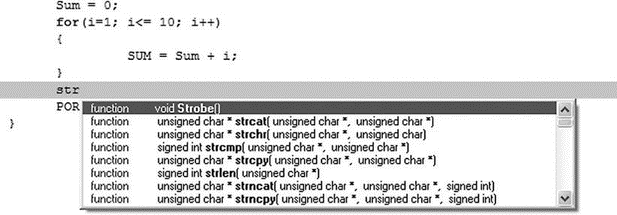
Figure 5.33: Using the Code Assistant
The Parameter Assistant is invoked when a parenthesis is opened after a function or a procedure name. The expected parameters are listed in a small window just above the parenthesis. In Figure 5.34, function strlen has been entered, and unsigned char *s appears in a small window when a parenthesis is opened.

Figure 5.34: Using the Parameter Assistant
Code Template is used to generate code in the program. For example, as shown in Figure 5.35, typing switch and pressing CTRL+J automatically generates code for the switch statement. We can add our own templates by selecting Tools?Options?Auto Complete. Some of the available templates are array, switch, for, and if.
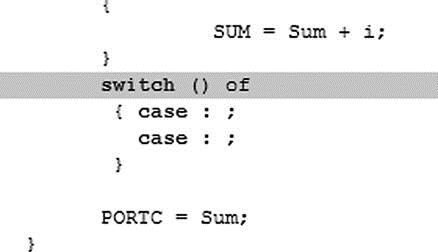
Figure 5.35: Using the Code Template
Auto Correct corrects typing mistakes automatically. A new list of recognized words can be added by selecting Tools?Options?Auto Correct Tab.
Bookmarks make the navigation easier in large code. We can set bookmarks by entering CTRL+SHIFT+number, and can then jump to the bookmark by pressing CTRL+number, where number is the bookmark number.
Bottom Section
The bottom section of the screen, also called the Message Window, consists of three tabs: Messages, Find, and QConverter. Compilation errors and warnings are reported under the Messages tab. Double-clicking on a message line highlights the line where the error occurred. A HEX file can be generated only if the source file contains no errors. Figure 5.36 shows the results of a successful compilation listed in the Message Window. The QConverter tab can be used to convert decimal numbers into binary or hexadecimal, and vice versa.

Figure 5.36: Display of a successful compilation
- 5.3 mikroC Integrated Development Environment (IDE)
- Speed considerations
- Internet Service Providers who use assigned IP addresses
- 2.2 Интерфейсы IDE, EIDE и АТА
- 2.3 Модель мини-драйвера IDE
- 1.2.1. Принципы построения модели IDEF0
- CHAPTER 4 Functions and Libraries in mikroC
- Сторож SpIDer Guard
- DirectX Tutorial 4: Full Screen and Depth Buffers
- Videoconferencing with Ekiga
- Capturing Screen Images
- Viewing Video
