Книга: C# 2008 Programmer
Animation — Part 1
Animation — Part 1
You can use the Timeline object to perform some simple animation. Figure 19-35 shows the page displaying an image. When the mouse hovers over the image, the image will expand. When you move the mouse away, the image returns to its original size.
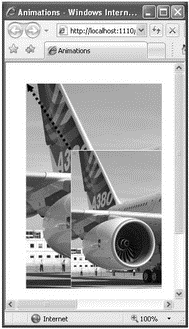
Figure 19-35
Using Expression Blend 2, create a new Silverlight project and name it Animations. Add an Image element to the page (see Figure 19-36).
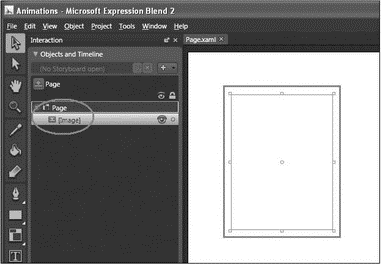
Figure 19-36
The XAML source of the page looks like this:
<Canvas

 xmlns="http://schemas.microsoft.com/client/2007"

 xmlns:x="http://schemas.microsoft.com/winfx/2006/xaml"

 Width="640" Height="480" Background="White">

 <Image Width="165" Height="220" Canvas.Top="70" Canvas.Left="71"/>

</Canvas>
Set the Source property of the Image control to reference an image (see Figure 19-37).
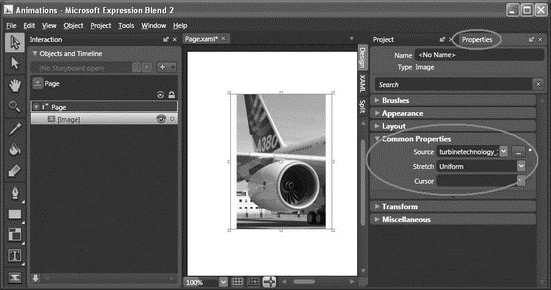
Figure 19-37
In the Objects and Timeline window, click the + button (see Figure 19-38), use the default name of StoryBoard1, and click OK.
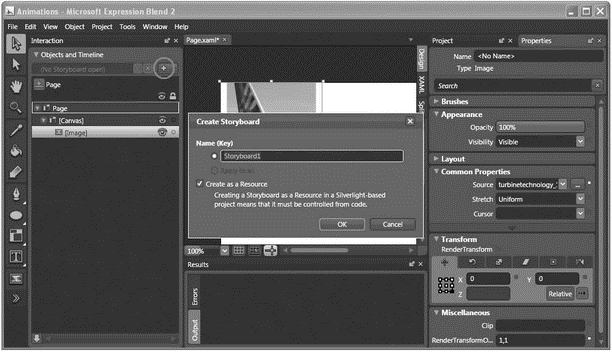
Figure 19-38
Click the Record Keyframe button (see Figure 19-39).
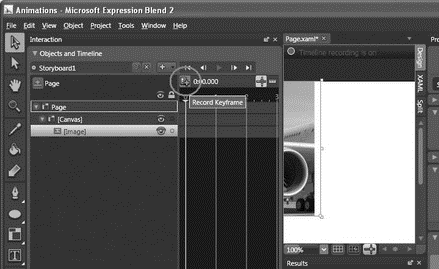
Figure 19-39
Move the yellow timeline (see Figure 19-40) to the 0:00.200 position and click the Record Keyframe button again.
If you like, you can magnify the timeline by setting the Timeline zoom to 500%.
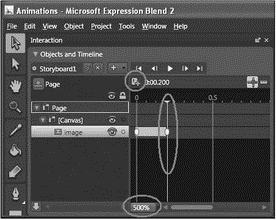
Figure 19-40
With the Image element selected, select the Properties Inspector and expand the Transform section. Click on the Scale tab. Set both X and Y to 1.5 (see Figure 19-41).
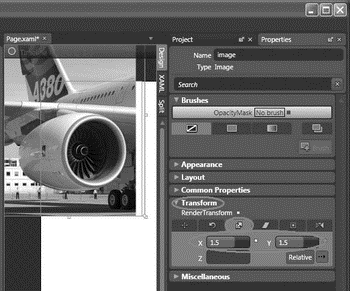
Figure 19-41
Add a second timeline to the project, and use its default name of StoryBoard2.
Click the Record Keyframe button, and then in the Properties Inspector's Transform section, click on the Scale tab again. Set both X and Y to 1.5 .
Move the yellow timeline to the 0:00.200 position and click the Record Keyframe button again.
In the Properties Inspector's Transform section, click the Scale tab. This time set both X and Y to 1.
Switch the project to XAML view, and add the following highlighted code:
<Image

 Width="165" Height="220"

 RenderTransformOrigin="1,1"

 Source="turbinetechnology_1.jpg"

 x:Name="image"

 MouseEnter="MouseEnter"

 MouseLeave="MouseLeave">

 <Image.RenderTransform>

  <TransformGroup>

   <ScaleTransform ScaleX="1" ScaleY="1"/>

   <SkewTransform AngleX="0" AngleY="0"/>

   <RotateTransform Angle="0"/>

   <TranslateTransform X="0" Y="0"/>

  </TransformGroup>

 </Image.RenderTransform>

</Image>
Append the following block of code to Page.xaml.js:
function MouseEnter(sender, eventArgs) {

 var obj = sender.findName("Storyboard1");

 obj.Duration="00:00:00.2000000";

 obj.begin();

}

function MouseLeave(sender, eventArgs) {

 var obj = sender.findName("Storyboard2");

 obj.Duration="00:00:00.2000000";

 obj.begin();

}
Press F5 to test the application. When the mouse now hovers over the image, the MouseEnter event is fired, and the Storyboard1 timeline object is executed for a duration of 0.2 second. The Storyboard1 timeline object basically scales the image horizontally and vertically by 1.5 times. When the mouse leaves the image, the MouseLeave event is fired, and the Storyboard2 timeline object is executed. It scales the image from 1.5 times down to its original size (within 0.2 second; see Figure 19-42).
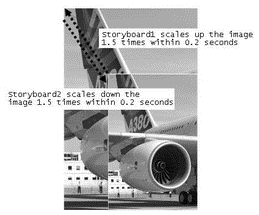
Figure 19-42
- Animations — Part 2
- 9.1.1. Partitions
- Choosing a Partitioning Scheme
- Part One. “Regulability”
- Part Two - Regulation By Code
- Part Three - Latent Ambiguities
- PART V Programming Linux
- PART VI Fedora Housekeeping
- PART VII Appendices
- Planning Partition Strategies
- Partitioning Your Hard Drive
- The Parts of a LOOP


