Книга: C# 2008 Programmer
Making the Shared Assembly Visible in Visual Studio
Making the Shared Assembly Visible in Visual Studio
By default, adding a shared assembly into the GAC does not make it appear automatically in Visual Studio's Add Reference dialog. You need to add a registry key for that to happen. Here's how to handle that.
First, launch the registry editor by typing regedit in the Run command box.
If you are using Windows Vista, make sure to run regedit as Administrator.
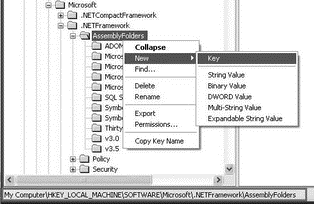
Navigate to the HKEY_LOCAL_MACHINESOFTWAREMicrosoft.NETFrameworkAssemblyFolders key. Right-click on the AssemblyFolders key and select New?Key (see Figure 15-39).

Figure 15-39
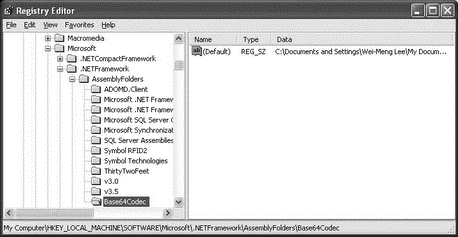
Name the new key Base64Codec. Double-click on the key's (Default) value, and enter the full path of the shared assembly (for example, C:Documents and SettingsWei-Meng LeeMy DocumentsVisual Studio 2008ProjectsBase64CodecbinDebug; see Figure 15-40).

Figure 15-40
Then restart Visual Studio 2008, and the assembly should appear in the Add Reference dialog.
- Using the Shared Assembly
- Shared Cache file
- 4.4.4 The Dispatcher
- About the author
- Chapter 7. The state machine
- Appendix E. Other resources and links
- Example NAT machine in theory
- The final stage of our NAT machine
- Compiling the user-land applications
- The conntrack entries
- Untracked connections and the raw table
- Basics of the iptables command


