Книга: C# 2008 Programmer
Creating a Shared Assembly
Разделы на этой странице:
Creating a Shared Assembly
You'll better understand how to create a shared assembly by actually creating one. In this example, you create a library to perform Base64 encoding and decoding. Basically, Base64 encoding is a technique to encode binary data into a text-based representation so that it can be easily transported over networks and Web Services. A common usage of Base64 is in emails.
Using Visual Studio 2008, create a new Class Library project and name it Base64Codec. In the default Class1.cs, define the Helper class containing two methods — Decode() and Encode():
using System;

using System.Collections.Generic;

using System.Linq;

using System.Text;

namespace Base64Codec {

 public class Helper {

  public byte[] Decode(string base64string) {

   byte[] binaryData;

   try {

    binaryData =

     Convert.FromBase64String(base64string);

    return binaryData;

   } catch (Exception) {

    return null;

   }

  }

  public string Encode(byte[] binaryData) {

   string base64String;

   try {

    base64String =

     Convert.ToBase64String(

      binaryData, 0, binaryData.Length);

    return base64String;

   } catch (Exception) {

    return string.Empty;

   }

  }

 }

}
Creating a Strong Name
To create a strong name for the assembly, you need to sign it. The easiest way is to use the Properties page of the project in Visual Studio 2008. Right-click on the project name in Solution Explorer, and select Properties. Select the Signing tab (see Figure 15-28), and check the Sign The Assembly checkbox. Select <New> from the Choose A Strong Name Key File dropdown list to specify a name for the strong name file.
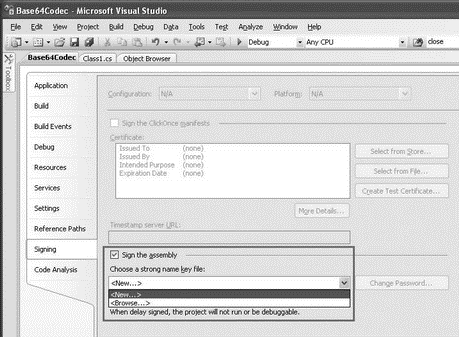
Figure 15-28
In the Create Strong Name Key dialog (see Figure 15-29), specify a name to store the pair of keys (KeyFile.snk, for instance). You also have the option to protect the file with a password. Click OK.
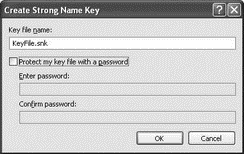
Figure 15-29
An SNK file is a binary file containing the pair of public and private keys.
A strong name file is now created in your project (see Figure 15-30).
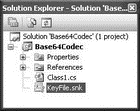
Figure 15-30
Alternatively, you can also use the command line to generate the strong name file:
sn -k KeyFile.snk
Versioning
With .NET, you can create different versions of the same assembly and share them with other applications. To specify version information, you can edit the AssemblyInfo.cs file, located under the Properties item in Solution Explorer (see Figure 15-31).
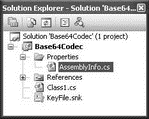
Figure 15-31
In the AssemblyInfo.cs file, locate the following lines:
...

// You can specify all the values or you can default the Build and Revision Numbers

// by using the '*' as shown below:

// [assembly: AssemblyVersion("1.0.*")]

[assembly: AssemblyVersion("1.0.0.0")]

[assembly: AssemblyFileVersion("1.0.0.0")]
The version number of an assembly is specified using the following format:
[Major Version, Minor Version, Build Number, Revision]
The AssemblyVersion attribute is used to identify the version number of an assembly. Applications that use this particular assembly reference this version number. If this version number is changed, applications using this assembly will not be able to find it and will break.
The AssemblyFileVersion attribute is used to specify the version number of the assembly, and it shows up in the properties page of the assembly (more on this in a later section).
Building the Assembly
Build the Class Library project so that Visual Studio 2008 will now generate the shared assembly and sign it with the strong name. To examine the shared assembly created, navigate to the binDebug folder of the project and type in the following command:
ildasm Base64Codec.dll
Figure 15-32 shows the public key stored in the manifest of the shared assembly.
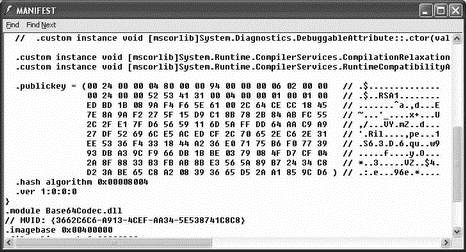
Figure 15-32
You can obtain the public key token of the shared assembly by using the following command:
sn -T Base64Codec.dll
Figure 15-33 shows the public key token displayed in the console window. Note this number because you will use it for comparison later.

Figure 15-33
- Visual Studio 2008 Overview
- Assemblies
- Private versus Shared Assemblies
- Мультитаргетинг в Visual Studio 2010
- Shared Cache file
- Creating CDs from the Command Line
- Creating and Deleting Device Objects
- Creating a Delegate
- Файл AssemblyInfo.cs в Visual Studio 2005
- Creating a Root Password and User Accounts
- Work with Shared Data in the
- Creating Users


