Книга: C# 2008 Programmer
Putting the Shared Assembly into GAC
Putting the Shared Assembly into GAC
To put the shared assembly that you have just built into the GAC, drag and drop it onto the Assembly Cache Viewer. Alternatively, you can also use the gacutil.exe utility to install the shared assembly into the GAC (see Figure 15-35):
gacutil /i Base64Codec.dll

Figure 15-35
If you are using Windows Vista, make sure to run the command prompt as Administrator.
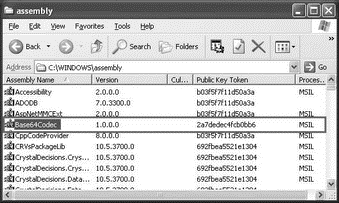
If the installation is successful, you will see the shared assembly in the Assembly Cache Viewer (see Figure 15-36).

Figure 15-36
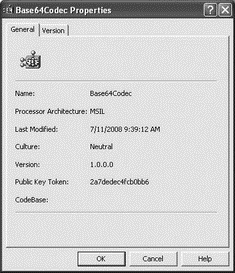
The version number displayed next to the DLL is specified by using the AssemblyVersion attribute in the AssemblyInfo.cs file (as discussed earlier). Select the Base64Codec DLL, and click the Properties button (the button with the tick icon) to see the Properties page as shown in Figure 15-37.

Figure 15-37
The version number displayed in this page is specified using the AssemblyFileVersion attribute.
To install different versions of the same assembly to the GAC, simply modify the version number in AssemblyInfo.cs (via the AssemblyVersion attribute), recompile the assembly, and install it into the GAC.
Physically, the shared assembly is copied to a folder located under the GAC_MSIL subfolder of the GAC, in the following format:
<Windows_Directory>assemblyGAC_MSIL<Assembly_Name><Version>_<Public_Key_Token>
In this example, it is located in:
C:WindowsassemblyGAC_MSILBase64Codec1.0.0.0_2a7dec4fb0bb6
Figure 15-38 shows the physical location of the Base64Codec.dll assembly.

Figure 15-38
- Shared Cache file
- Инструкция INSERT INTO ... FROM ... UNION ...
- 4.4.4 The Dispatcher
- About the author
- Chapter 7. The state machine
- Appendix E. Other resources and links
- Example NAT machine in theory
- The final stage of our NAT machine
- Compiling the user-land applications
- The conntrack entries
- Untracked connections and the raw table
- Basics of the iptables command


