Книга: C# 2008 Programmer
Components of the IDE
Разделы на этой странице:
Components of the IDE
Figure 2-9 shows the various parts of the Visual Studio 2008 development environment.
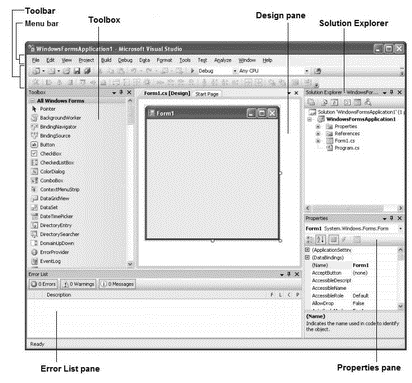
Figure 2-9
These parts are described in the following sections.
Menu Bar
The Menu bar contains standard Visual Studio commands. For example, Figure 2-10 shows that the File menu (see Figure 2-10) contains commands that enable you to create new projects, open existing projects, save the current form, and so on.
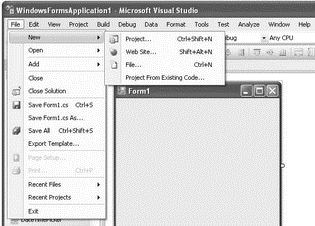
Figure 2-10
To customize the items displayed in the Menu bar, select Tools?Customize to display the Customize dialog (see Figure 2-11). Click on the Commands tab; the list of main menu items (Action, Addins, Analyze, and so forth) is on the left. Selecting a main menu item displays the list of available submenu items on the right. You can rearrange the submenu items by dragging them and dropping them onto the desired main menu item.
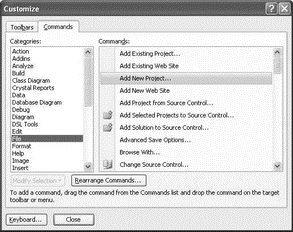
Figure 2-11
To add a new submenu item to a main menu item, click the Rearrange Commands button. In the Rearrange Commands dialog (see Figure 2-12), select the menu you want to customize, and click the Add button. You can then select the various submenu items from the different categories to add to the menu.
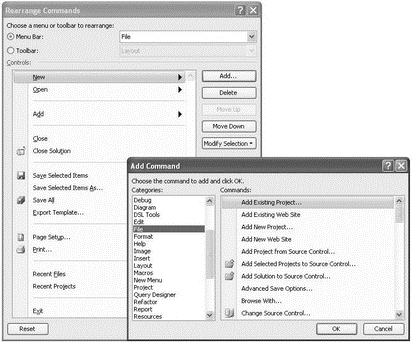
Figure 2-12
Toolbar
The Toolbar (see Figure 2-13) contains shortcuts to many of the often used commands contained in the Menu bar.

Figure 2-13
As with the Menu bar, the Toolbar is also customizable. To add additional toolbars, simply right-click on any existing toolbar and check the toolbar(s) you want to add to Visual Studio from the list of toolbars available (see Figure 2-14).
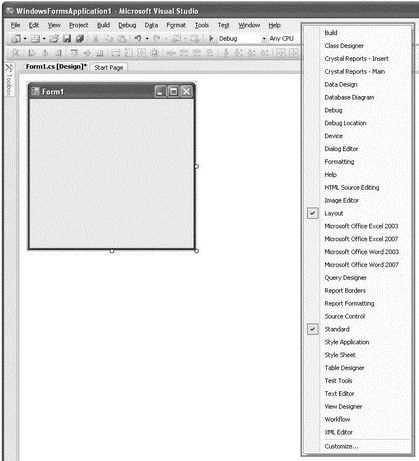
Figure 2-14
To customize the Toolbar, select Tools?Customize. On the Toolbars tab of the Customize dialog (see Figure 2-15), check the toolbar(s) you want to add to Visual Studio. You can create your own custom toolbar by clicking the New button.
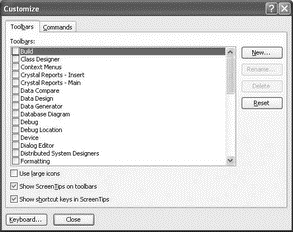
Figure 2-15
As with the Menu bar, you can also rearrange the items displayed in each toolbar. To customize the items displayed in the Toolbar, select Tools?Customize to open the Customize dialog and then click the Rearrange Commands button. The Rearrange Commands dialog allows you to add/delete items from each toolbar (see Figure 2-16).
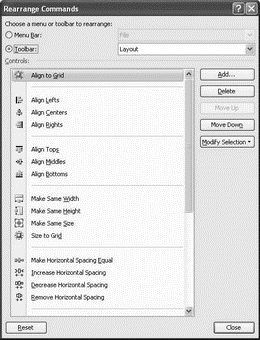
Figure 2-16
Each toolbar in the Toolbar can also be physically rearranged in Visual Studio by dragging the four-dot line on the left edge of the toolbar (see Figure 2-17) and relocating it to the new desired position.

Figure 2-17
Toolbox
The Toolbox (see Figure 2-18) contains all the controls that you can use in your applications. You can drag controls from the Toolbox and drop them onto the design surface of your application.
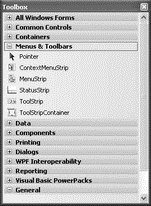
Figure 2-18
Each tab in the Toolbox contains controls that are related to a specific purpose. You can create your own tab to house your own controls. To do so, right-click on the Toolbox and select Add Tab. Name the newly created tab (see Figure 2-19).
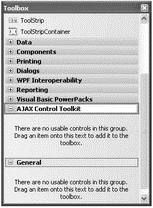
Figure 2-19
To add controls to the Toolbox, right-click on the tab to which you want the controls added and select Choose Items. The Choose Toolbox Items dialog (see Figure 2-20) opens.
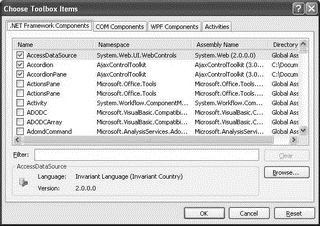
Figure 2-20
You can add the following types of controls to the Toolbox:
? .NET Framework components
? COM components
? WPF components
? Workflow activities
You can also click the Browse button to locate the .dll file that contains your own custom controls.
Another way to add controls to the Toolbox is to simply drag the DLL containing the controls and drop it directly onto the Toolbox.
You can relocate the Toolbox by dragging it and repositioning it on the various anchor points on the screen. Figure 2-21 shows the anchor points displayed by Visual Studio 2008 when you drag the Toolbox.
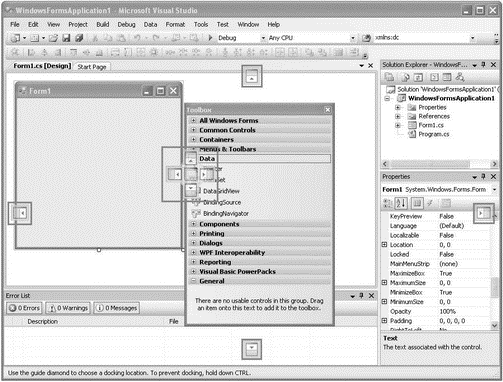
Figure 2-21
If you have limited screen real estate, you might want to auto-hide the Toolbox by clicking the Auto Hide button (see Figure 2-22).
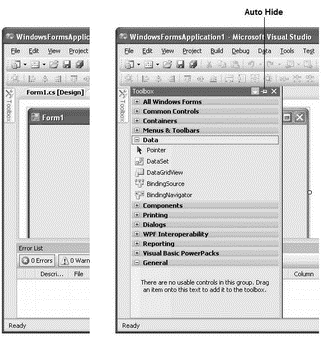
Figure 2-22
Missing Controls in Toolbox
Sometimes, for some unknown reasons, the controls in the Toolbox may suddenly go missing. The usual remedy is to right-click the Toolbox and select Reset Toolbox. This works most of the time. However, if that fails to work, you may need to do the following:
Navigate to C:Documents and Settings<user_name>Local SettingsApplication DataMicrosoftVisualStudio9.0.
Within this folder are some hidden files. Simply delete the following files: toolbox.tbd, toolboxIndex.tbd, toolbox_reset.tbd, and toolboxIndex_reset.tbd.
Then restart Visual Studio 2008. Your controls should now come back up!
Solution Explorer
The Solution Explorer window contains all the files and resources used in your project. A solution contains one or more projects. Figure 2-23 shows the various buttons available in the Solution Explorer.
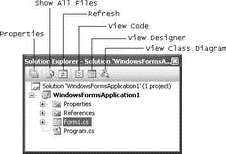
Figure 2-23
The buttons in the Solution Explorer window are context sensitive, which means that some buttons will not be visible when certain items are selected. For instance, if you select the project name, the View Code and View Designer buttons will not be shown.
To add additional items such as a Windows Form or a Class to your current project, right-click the project name in Solution Explorer, select Add (see Figure 2-24), and then choose the item you want to add from the list.
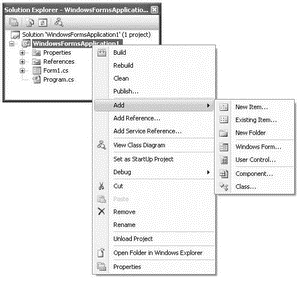
Figure 2-24
You can also add new (or existing) projects to the current solution. To do so, right-click on the solution name in Solution Explorer, select Add (see Figure 2-25), and then select what you want to add.
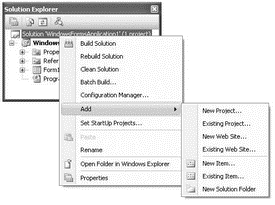
Figure 2-25
When you have multiple projects in a solution, one of the projects will be set as the startup project (the project name that is displayed in bold in Solution Explorer is the startup project). That is, when you press F5 to debug the application, the project set as the startup project will be debugged. To change the startup project, right-click the project that you want to set as the startup and select Set as Startup Project (see Figure 2-26).
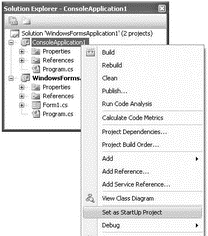
Figure 2-26
To debug multiple projects at the same time when you press the F5 key, set multiple projects as the startup projects. To do so, right-click on the solution name in Solution Explorer and select Properties.
Select the Multiple Startup Projects option (see Figure 2-27), and set the appropriate action for each project (None, Start, or Start Without Debugging).
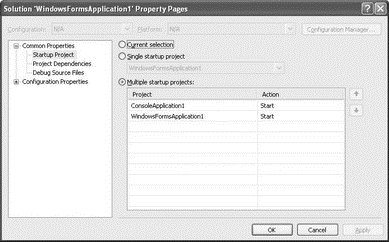
Figure 2-27
Then when you press F5, the projects configured to start launch at the same time.
Properties
The Properties window shows the list of properties associated with the various items in your projects (Windows Forms, controls, projects, solutions, etc).
Figure 2-28 shows the Properties window displaying the list of properties of a Windows Form (Form1, in this example). By default, the properties are displayed in Categorized view, but you can change it to Alphabetical view, which lists all the properties in alphabetical order.
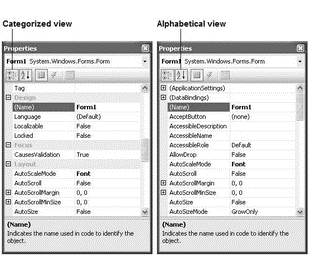
Figure 2-28
All default property values are displayed in normal font, while nondefault values are displayed in bold. This feature is very useful for debugging because it enables you to quickly trace the property values that you have changed.
Besides displaying properties of items, the Properties window also displays events. When the Properties window is displaying an item (such as a Windows Form or a control) that supports events, you can click the Events icon (see left side of Figure 2-29) to view the list of events supported by that item. To create an event handler stub for an event, simply double-click the event name and Visual Studio 2008 automatically creates an event handler for you (see right side of Figure 2-29).
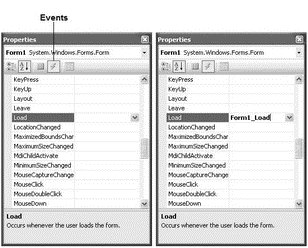
Figure 2-29
Error List
The Error List window (see Figure 2-30) is used to display:
? Errors, warnings, and messages produced as you edit and compile code.
? Syntax errors noted by IntelliSense.

Figure 2-30
To display the Error List window, select View?Error List.
You can double-click on an error message to open the source file and locate the position of the error. Once the error is located, press F1 for help.
Output Window
The Output window (View?Output) displays status messages for your application when you are debugging in Visual Studio 2008. The Output window is useful for displaying debugging messages in your application. For example, you can use the Console.WriteLine() statement to display a message to the Output window:
Console.WriteLine(DateTime.Now.ToString());
Figure 2-31 shows the message displayed in the Output window.
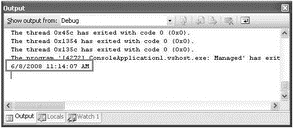
Figure 2-31
Designer Window
The Designer window enables you to visually design the UI of your application. Depending on the type of projects you are creating, the Designer displays a different design surface where you can drag and drop controls onto it. Figure 2-32 shows the Designer for creating different types of projects — Windows Forms (left), Windows Mobile (right), and Web (bottom left).
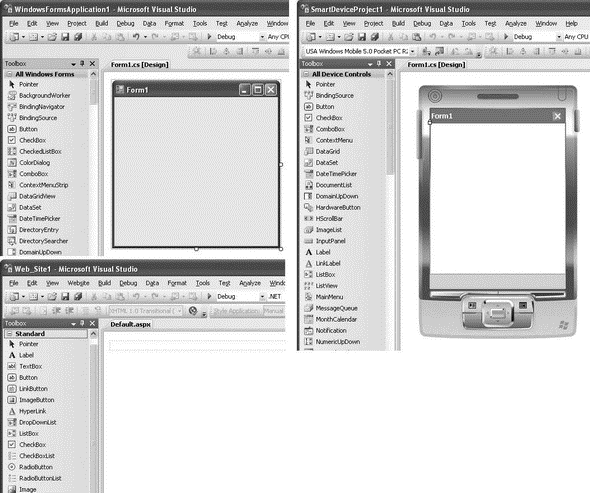
Figure 2-32
To switch to the code-behind of the application, you can either double-click on the surface of the designer, or right-click the item in Solution Explorer and select View Code. For example, if you are developing a Windows Forms application, you can right-click on a form, say Form1.cs, in Solution Explorer and select View Code. The code-behind for Form1 then displays (see Figure 2-33).
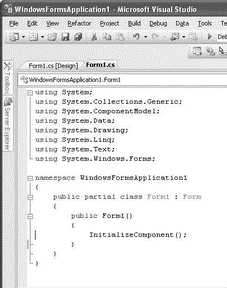
Figure 2-33
Code View
Code view is where you write the code for your application. You can switch between design view and code view by clicking on the relevant tabs (see Figure 2-34).
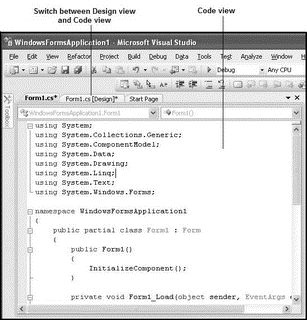
Figure 2-34
In Visual Studio, you can right-click on the tabs (see Figure 2-35) to arrange the code view either horizontally or vertically, to maximize the use of your monitor(s).
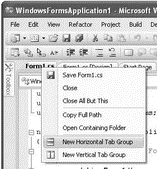
Figure 2-35
Figure 2-36 shows the code view and design view displaying horizontally.
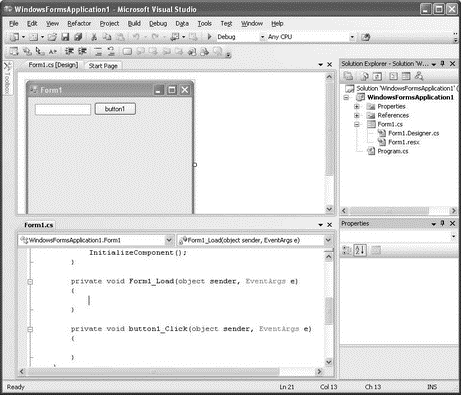
Figure 2-36
Figure 2-37 shows the code view and design view displaying vertically.
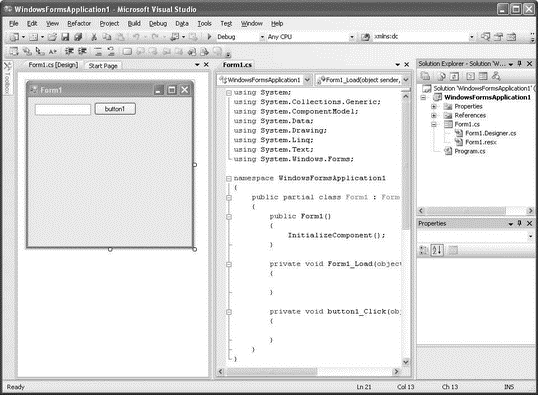
Figure 2-37
Having multiple views at the same time is useful if you have a big monitor (or multiple monitors).
- Working with Gnome Office
- 10.1.2. Goals of DCE
- 10.1.3. DCE Components
- 10.6.2. Security Components
- 3.4 Target System Software Initialization Sequence
- 9.2.6 Other Components
- Resetting the Development Settings
- Lesson 3: Cloning Components
- 4.4.4 The Dispatcher
- About the author
- Chapter 7. The state machine
- Appendix E. Other resources and links


