Книга: Mastering VMware® Infrastructure3
Deploying ESXi Installable
Deploying ESXi Installable
The installation of ESXi Installable begins by ensuring that the computer system is configured to boot from the CD-ROM drive. To do this, insert the ESXi Installable installation CD into the drive and power on the system. The installation files can be downloaded from VMware's website at http://www.vmware.com/downloads. The installation files for ESXi are listed separately from ESX Server 3.5. Once the server is powered on and boots from the CD, the VMware VMvisor Boot Menu will display, as shown in Figure 13.2. To make changes to the installation parameters, press the Tab key. The default parameters will show beneath the boot menu.
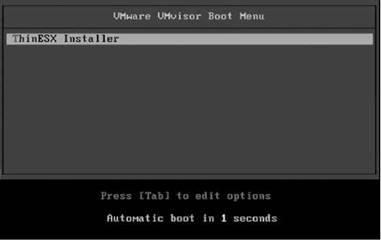
Figure 13.2 Installing ESXi Installable to local drives requires downloading the appropriate disk image (.iso) from VMware.
Once you accept the license agreement, you will have the opportunity to select the hard drive onto which you wish to install ESXi. The available logical disks will be listed as shown in Figure 13.3. The ESXi Installable requires local hard drives to be available for the installation. The local hard drives can be Serial ATA (SATA), SCSI, or Serial Attached SCSI (SAS) as long as they are connected to a controller that is listed on the ESXi compatibility guide. The size of the hard drives is irrelevant since enterprise deployments of VI3 will most commonly place all virtual machines, templates, and ISOs on a shared storage device. Keep that in mind when you are in the process of identifying hardware specifications for new servers that you intend to use as thin virtualization clients with ESXi Installable. Do not incur the expenses of large disk arrays for the local storage on ESXi hosts. The smallest hard drives available in a RAID1 configuration will provide ample room and redundancy for the installation of ESXi.
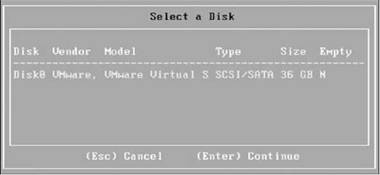
Figure 13.3 ESXi can be installed on SATA, SCSI, or SAS drives.
If the disk you select for the installation has existing data, you will receive a warning message about the data being overwritten with the new installation, as shown in Figure 13.4. Always be sure that answering yes to this prompt does not erase any critical data.
Once the installation process begins, it takes only a few minutes to load the thin hypervisor. Upon completion, the server will require a reboot and is configured by default to obtain an IP address via DHCP. Later in this chapter we'll discuss how to configure and manage ESXi.

Figure 13.4 Disks with existing data will be overwritten during the ESXi installation procedure.
Perform the following steps to install ESXi:
1. Insert the ESXi Installable installation CD into the physical CD-ROM drive.
2. Boot the computer from the installation CD.
3. Allow the three-second Automatic boot timer to expire before beginning the installation of the ThinESX Installer option selected on the VMware VMvisor Boot Menu.
4. The setup process will load the VMware ISO and VMkernel components, as shown in Figure 13.5.
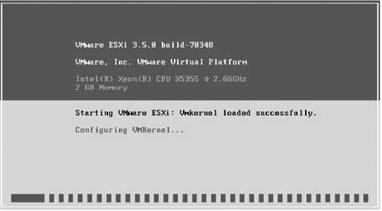
Figure 13.5 The VMware ISO will load the VMkernel components to begin the installation.
5. Once the components are loaded and the Welcome to the VMware ESXi 3.5.0 Installation screen is displayed, as shown in Figure 13.6, press Enter to perform the installation.
6. Press the F11 key to accept the license agreement and to continue the installation.
7. Select the appropriate disk onto which you will install ESXi and press the Enter key to continue.
8. If you receive a warning about existing data, press Enter to continue only after verifying that the data loss will not be of concern.
9. Press the F11 key to install.
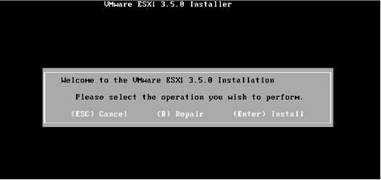
Figure 13.6 Installing ESXi on a local disk.
- Chapter 13 Configuring and Managing ESXi
- Chapter 2 Building and Deploying a Run-Time Image
- Deploying security templates to multiple computers
- Deploying a security policy to multiple computers
- Deploying software through Group Policy
- Deploying software throughout your organization
- Deploying printer connections
- Deploying the Application
- Understanding ESXi Architecture
- Lesson 4: Deploying a Run-Time Image on a Target Platform
- Lab 2: Building and Deploying a Run-Time Image
- Creating Templates and Deploying Virtual Machines
