Книга: Mastering VMware® Infrastructure3
Managing and Maintaining ESX Server Permissions
Разделы на этой странице:
Managing and Maintaining ESX Server Permissions
Both the VirtualCenter Server and the ESX Server use the same structured security model to grant users the ability to manage portions of the virtual infrastructure. As shown in Figure 8.1, this model consists of users (groups), roles, privileges, and permissions.
The items that differ between the non-VirtualCenter environment and the VirtualCenter environment are predominantly in two areas:
? The location of the user and group objects created
? The level of granularity of the roles and privileges available in each environment
For environments that don't have VirtualCenter, or where the administrator chooses to have users authenticate directly to the ESX Server to perform management tasks, it is important to start with a discussion of the security model.
Permissions to an ESX Server host are assigned to Linux-based users and groups that exist in the Service Console. Perform the following steps to view the ESX Server users and groups:
1. Use the VI Client to connect to an ESX Server host.
2. Select the host in the inventory panel and then click the Users & Groups tab, as shown in Figure 8.2.
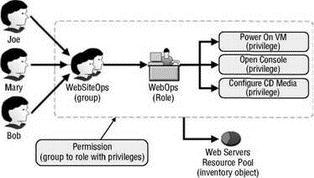
Figure 8.1 VI3 security model for assigning access control
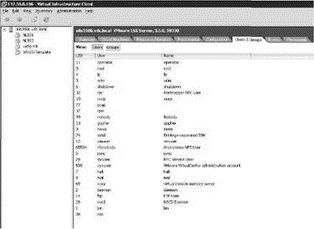
Figure 8.2 ESX users and groups are stored in the Service Console.
When constructing a virtual infrastructure, it is important from a security standpoint to identify who in your organization needs access to your ESX host to perform any level of management, using either an SSH connection (like Putty, WinSCP, FastSCP, etc.), the VI Client, and/or the web interface that we will discuss later in this chapter. The root username and password should be distributed with caution. If you determine that multiple users should be allowed direct access to an ESX Server host, provide each user with their own user account.
As mentioned in the introduction, the VI3 and ESX Server security model are composed of users (or groups), roles, privileges, and permissions. In its most basic format, users or groups are assigned to a role that has privileges. The user-role-privilege combination is then associated with an object in the inventory as a permission.
There are two buttons on the Users & Groups tab, the Users button and the Groups button, as shown in Figure 8.2. Users and groups — or at least the groups — are created in order to assign the group to the appropriate role. So what exactly is a role?
ESX Server permissions are set up to help simplify assignment. Rather than choose the individual privilege to be assigned each time you need to delegate, you assign a user or group to a role. Then, the role is granted role a privilege or group of privileges. As shown in Figure 8.3, the Service Console houses three default roles: No Access, Read-only, and Administrator.
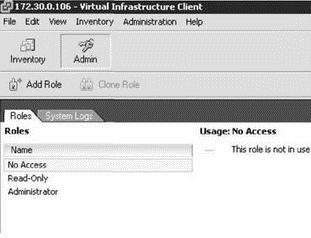
Figure 8.3 The Service Console includes default roles for assigning capabilities on an ESX Server host.
The No Access role works as the name suggests. This role prevents access to an object or objects in the inventory. The No Access role can be used if a user was granted access higher up in the inventory. The No Access role can also be used at lower-level objects to prevent object access. For example, if a user is granted permissions at the ESX Server host but should be prevented access to a specific virtual machine, use the No Access role.
Read-Only allows a user to see the objects within the VI Client inventory. It does not allow the user to interact with any of the visible objects in any way. For example, a user with the Read-Only permission would be able to see a list of virtual machines in the inventory but could not act on any of them.
The Administrator role by nature has the utmost authority, but it is only a role, and it needs to be assigned using a combination of a user or group object and an inventory object like a virtual machine.
With only three built-in roles in the Service Console, the defaults don't leave room for much flexibility. However, don't let that slow you down. The limits of the default roles are easily overcome by creating custom roles. You can create custom roles that will better suit your needs, or you can clone existing roles to make additional roles to modify for your own purposes.
The default roles should not be modified. If a role does not suit the management needs, create a custom role. If you alter a default role, it may present a scenario where other administrators unknowingly grant too much or too little permission by assigning membership in a default role.
Default ESX Server Permission Assignments
By default, when ESX is installed the only user that exists is the root user, and root has full administrative permissions to the entire server, as shown in this image:
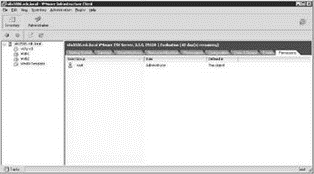
This default set of permissions changes when an ESX Server is managed by VirtualCenter. The process of adding a host to VirtualCenter adds an agent (the VirtualCenter Agent) and an additional Service Console account called vpxuser. The vpxuser account has a 32-character, complex, and randomly generated password that is also granted membership in the Administrator role on an ESX Server host. This assignment enables the VirtualCenter service to carry out tasks on the ESX hosts in the inventory.
For example, assume that a set of users needs to interact with the console of a virtual machine, and also needs to change the CD and floppy media of those virtual machines. In the following steps, you'll create a custom role named VMusers:
1. Use the VI Client to connect to an ESX Server host.
2. Click the Admin button from the menu bar.
3. Ensure the Roles tab is selected and click the Add Role button.
4. Type the name of the new role in the Enter Name text box (in this example, VMUsers) and then select the privileges that will be required by members of the role, as shown in Figure 8.4.
5. Click OK to complete the custom role creation.
Permissions for Changing Virtual Media
To change floppy and CD media using FLP and ISO images that are stored on a SAN volume, you will also need to grant that group browse datastore privileges at the root of the hierarchy — in this case, at the ESX host itself.
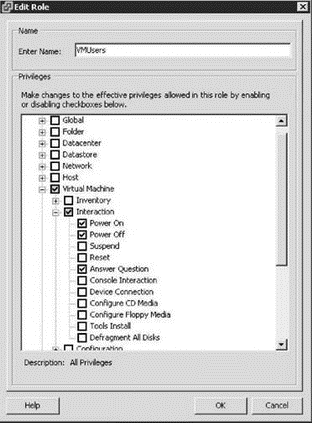
Figure 8.4 Custom roles strengthen management capabilities and add flexibility to permission delegations.
As simple and useful as roles are, they are not functional until a user or group is assigned to the role, and then the role is assigned to an inventory object. Assume that a group of users exists that needs to interact with all virtual machines that are web servers. If access control is managed through the ESX Server, then you have to create a user account in the Service Console along with a new group — for example, SiteOperators. Once you've created these Linux-based users and groups, you can execute the security model. Follow these steps to grant virtual machine access control to a Service Console user or group:
1. Use the VI Client to connect to an ESX Server host.
2. Right-click the object in the inventory to which permission should be assigned and click the Add Permission option, as shown in Figure 8.5.
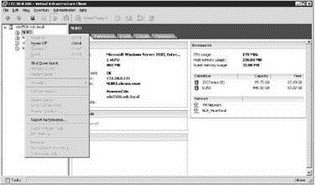
Figure 8.5 Granting access control begins with selecting the inventory object to which access must be granted.
3. Click the Add button in the Assign Permissions dialog box, as shown in Figure 8.6.
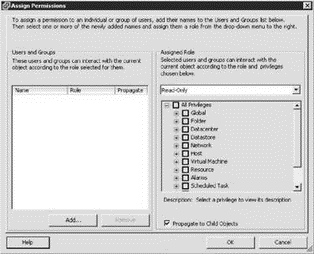
Figure 8.6 The Assign Permissions dialog box allows you to select a user or group and associate it with an ESX Server role.
4. Select the appropriate user or group (in this case, SiteOperators) and then click the Add button, as shown in Figure 8.7.
5. Select the role that the Service Console users or groups should belong to, as shown in Figure 8.8.
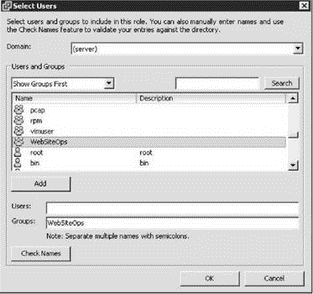
Figure 8.7 Service console users and groups can be granted access to inventory objects.
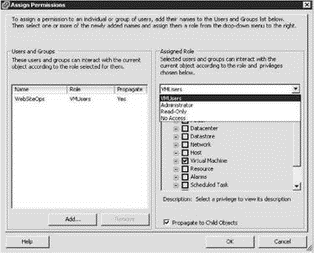
Figure 8.8 The selection of a role ultimately dictates the privilege level a user or group has on an object.
What if you have an ESX Server that will host 30 virtual machines and 10 of those are the web server virtual machines? As previously demonstrated, this approach then requires that you assign permissions on each of the ten web server virtual machines. This is not an efficient process. Further growth resulting in more web server virtual machines would require additional administrative effort to ensure access control. When creating a role, you'll notice an option, Propagate to Child Objects, that you can use to facilitate access control implementation. This option works like the inheritance settings in a Windows file system. It allows the privileges assigned in this role to be applied to objects beneath the selected object. For example, if the VMUsers role is applied as a permission on the ESX Server host in the inventory panel, and the Propagate to Child Objects option is enabled, all members of the VMusers role could interact with all the virtual machines hosted on the ESX Server. While this certainly simplifies access control implementation, it adds another problem: the permissions of the VMUsers role has been overextended and now applies to all virtual machines and not just the web server. With access control granted at the host level, VMUsers will be able to change floppy and CD media and use the console of the web server virtual machines, but they will also be able to do that on any other virtual machine in the inventory.
This issue presents one of the drawbacks of managing access control on an individual ESX Server host. Keep in mind as well that all of the steps we have discussed so far would have to be performed on each ESX Server in the virtual infrastructure. What if there was a way to organize the inventory of virtual machines? In other words, what if we could create an object for the web server virtual machines and put all of the web server virtual machines within that object? Then we could assign the group to the role at the parent object level and let inheritance take over. As shown in Figure 8.9, the problem is that folder objects are not possible on a single ESX Server host.
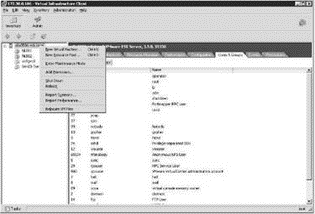
Figure 8.9 Folder objects cannot be added to an individual ESX Server, leaving resource pools as the only viable solution for organizing virtual machines.
A resource pool is actually a special object, a folder of sorts, that we will discuss in the next chapter in great detail, but the good news is that it will also help to organize our virtual machines. One byproduct of the resource pool is the ability to manipulate and manage many virtual machines as objects within the logical resource pool object.
Perform the following steps to create a resource pool:
1. Use the VI Client to connect to an ESX Server host.
2. Right-click the hostname and select New Resource Pool, as shown in Figure 8.10.
3. Type a resource pool name in the Name text box, in this case WebServers, as shown in Figure 8.10.
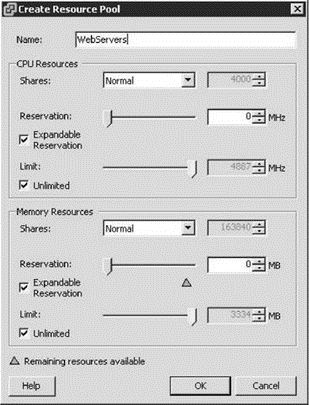
Figure 8.10 Resource pools provide a means of allocating resources as well as organizing virtual machines.
4. Configure the resource allocations if desired to establish limits and reservations for the resource pool. The limit will establish a hard cap on the resource usage while the reservations establish a resource guarantee.
5. Click OK.
So now that we've created a WebServers resource pool, virtual machines can be placed under the resource pool, as shown in Figure 8.11.
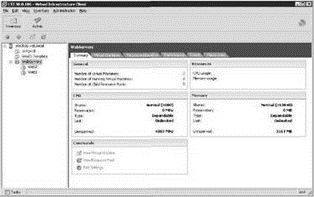
Figure 8.11 Virtual machines can be placed into resource pools for resource management purposes.
Resource pools become inventory objects to which permissions can be assigned, as shown in Figure 8.12.
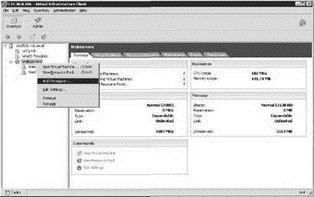
Figure 8.12 As an object in the inventory, resource pools are potential levels of infrastructure management.
Permissions can be removed from inventory objects when management needs change or when improper assignments have been made. In the previous example, the inappropriate permission previously applied to the host itself should be removed now that more appropriate permissions have been configured at the resource pool object.
Use the following steps to remove permissions on an object in the inventory:
1. Use the VI Client to connect to an ESX Server host.
2. Select the object in the inventory and then select the Permissions tab.
3. Right-click the permissions entry to be deleted from the list of existing permissions and then click the Delete option, as shown in Figure 8.13.
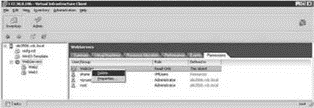
Figure 8.13 Permissions are removed from inventory objects as easily as they are added.
You should see a warning indicating that users may retain their permissions because of an assignment higher in the hierarchy; however, in this case, that is what we are trying to accomplish. We want the users to have access to the virtual machines as a result of permissions applied at the resource pool, not the ESX Server.
Once permissions have been assigned throughout the inventory, it is easy to lose track of what has been previously been done. Of course, if your company mandates documentation, there might already be a solid audit trail. However, it is easy to see existing role usage from within the VI Client.
To identify where a role has been assigned as a permission:
1. Use the VI Client to connect to an ESX Server host.
2. Click the Admin button from the toolbar.
3. Click on the role whose usage you wish to identify.
As shown in Figure 8.14, the details pane will identify where in the inventory the role has been used.
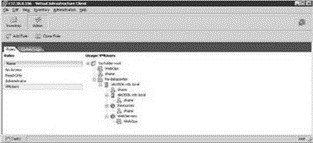
Figure 8.14 The VI Client makes it easy to identify where a role has been assigned as a permission.
Over time, it is almost inevitable that management needs will change. At times, you may have to create new roles, edit an existing role, or even delete a role. If a role is not used, it should be removed simply to minimize the number of objects to be viewed and managed.
To delete a role:
1. Use the VI Client to connect to an ESX Server host.
2. Click the Admin button from the toolbar.
3. From the Roles tab, right-click the role to be deleted and select the Remove option, as shown in Figure 8.15.
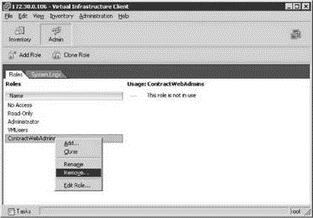
Figure 8.15 Unused roles should be removed to minimize the objects viewed and managed on an ESX Server.
When a role is in use and is selected for removal, the ESX Server will offer the opportunity to transfer the existing role members to a new role or simply to drop all members from the role, as shown in Figure 8.16. This eliminates the opportunity for accidentally deleting roles that are being used in the inventory.
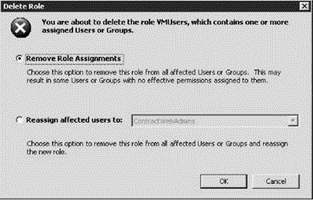
Figure 8.16 When you attempt to delete a role that is in use, you'll see a prompt that asks if you want to drop or reassign the role members.
Now that you understand how to work with Linux-based users, groups, roles, and permissions on an ESX Server host, be aware that you more than likely will not be doing much of this. Managing the Linux-based user accounts is administratively more cumbersome because of the lack of centralized management and authentication. This is, of course, because the bulk, if not all, of your access control strategies should revolve around Windows-based user accounts accessing the VirtualCenter environment. This offers the advantage of having a centralized user database with a single password management process.
- Тестирование Web-сервиса XML с помощью WebDev.WebServer.exe
- InterBase Super Server для Windows
- Каталог BIN в SuperServer
- Минимальный состав сервера InterBase SuperServer
- InterBase Classic Server под Linux
- Каталог BIN в InterBase Classic Server для Linux
- SuperServer
- Classic vs SuperServer
- Рекомендации по выбору архитектуры: Classic или SuperServer?
- Улучшенное время отклика для версии SuperServer
- Эффективное взаимодействие процессов архитектуры Classic Server
- Yaffil Classic Server - замена InterBase Classic 4.0
