Книга: Beginning Android
Taking a Peek
Taking a Peek
In the sample project Menus/Menus at http://apress.com/, you will find an amended version of the ListView sample (List) with an associated menu. Since the menus are defined in Java code, the XML layout need not change and is not reprinted here.
However, the Java code has a few new behaviors, as shown here:
public class MenuDemo extends ListActivity {

 TextView selection;

 String[] items={"lorem", "ipsum", "dolor", "sit", "amet",

  "consectetuer", "adipiscing", "elit", "morbi", "vel",

  "ligula", "vitae", "arcu", "aliquet", "mollis",

  "etiam", "vel", "erat", "placerat", "ante",

  "porttitor", "sodales", "pellentesque", "augue", "purus"};

 public static final int EIGHT_ID = Menu.FIRST+1;

 public static final int SIXTEEN_ID = Menu.FIRST+2;

 public static final int TWENTY_FOUR_ID = Menu.FIRST+3;

 public static final int TWO_ID = Menu.FIRST+4;

 public static final int THIRTY_TWO_ID = Menu.FIRST+5;

 public static final int FORTY_ID = Menu.FIRST+6;

 public static final int ONE_ID = Menu.FIRST+7;

 @Override

 public void onCreate(Bundle icicle) {

  super.onCreate(icicle);

  setContentView(R.layout.main);

  setListAdapter(new ArrayAdapter<String>(this,

   android.R.layout.simple_list_item_1, items));

   selection = (TextView)findViewById(R.id.selection);

   registerForContextMenu(getListView());

 }

 public void onListItemClick(ListView parent, View v,

  int position, long id) {

  selection.setText(items[position]);

 }

 @Override

 public void onCreateContextMenu(ContextMenu menu, View v,

  ContextMenu.ContextMenuInfo menuInfo) {

  populateMenu(menu);

 }

 @Override

 public boolean onCreateOptionsMenu(Menu menu) {

  populateMenu(menu);

  return(super.onCreateOptionsMenu(menu));

 }

 @Override

 public boolean onOptionsItemSelected(MenuItem item) {

  return(applyMenuChoice(item) ||

   super.onOptionsItemSelected(item));

 }

 @Override

 public boolean onContextItemSelected(MenuItem item) {

  return(applyMenuChoice(item) ||

   super.onContextItemSelected(item));

 }

 private void populateMenu(Menu menu) {

  menu.add(Menu.NONE, ONE_ID, Menu.NONE, "1 Pixel");

  menu.add(Menu.NONE, TWO_ID, Menu.NONE, "2 Pixels");

  menu.add(Menu.NONE, EIGHT_ID, Menu.NONE, "8 Pixels");

  menu.add(Menu.NONE, SIXTEEN_ID, Menu.NONE, "16 Pixels");

  menu.add(Menu.NONE, TWENTY_FOUR_ID, Menu.NONE, "24 Pixels");

  menu.add(Menu.NONE, THIRTY_TWO_ID, Menu.NONE, "32 Pixels");

  menu.add(Menu.NONE, FORTY_ID, Menu.NONE, "40 Pixels");

 }

 private boolean applyMenuChoice(MenuItem item) {

  switch (item.getItemId()) {

   case ONE_ID:

    getListView().setDividerHeight(1);

    return(true);

   case EIGHT_ID:

    getListView().setDividerHeight(8);

    return(true);

   case SIXTEEN_ID:

    getListView().setDividerHeight(16);

    return(true);

   case TWENTY_FOUR_ID:

    getListView().setDividerHeight(24);

    return(true);

   case TWO_ID:

    getListView().setDividerHeight(2);

    return(true);

   case THIRTY_TWO_ID:

    getListView().setDividerHeight(32);

    return(true);

   case FORTY_ID:

    getListView().setDividerHeight(40);

    return(true);

  }

  return(false);

 }

}
In onCreate(), we register our list widget as having a context menu, which we fill in via our populateMenu() private method, by way of onCreateContextMenu(). We also implement the onCreateOptionsMenu() callback, indicating that our activity also has an options menu. Once again, we delegate to populateMenu() to fill in the menu.
Our implementations of onOptionsItemSelected() (for options-menu selections) and onContextItemSelected() (for context-menu selections) both delegate to a private applyMenuChoice() method, plus chaining upwards to the superclass if none of our menu choices was the one selected by the user.
In populateMenu() we add seven menu choices, each with a unique identifier. Being lazy, we eschew the icons.
In applyMenuChoice() we see if any of our menu choices were chosen; if so, we set the list’s divider size to be the user-selected width.
Initially the activity looks the same in the emulator as it did for ListDemo (see Figure 11-1).
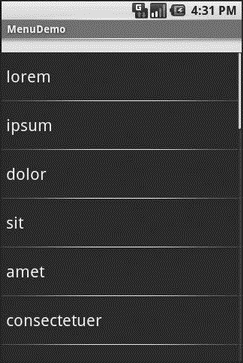
Figure 11-1. The MenuDemo sample application, as initially launched
But if you press the Menu button, you will get our options menu (Figure 11-2).
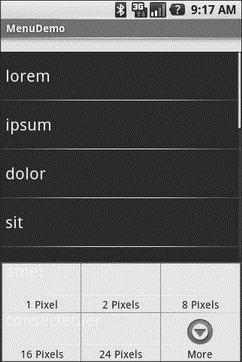
Figure 11-2. The same application, showing the options menu
Clicking the More button shows the remaining two menu choices (Figure 11-3).
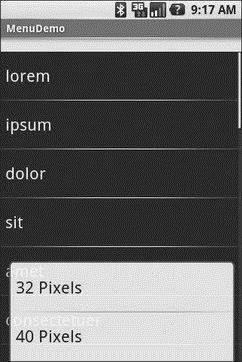
Figure 11-3. The same application, the remaining menu choices
Choosing a height (say, 16 pixels) then changes the divider height of the list to something garish (Figure 11-4).
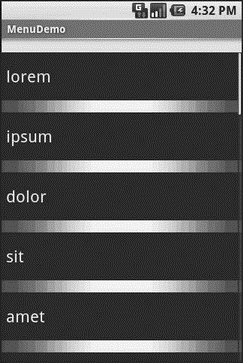
Figure 11-4. The same application, made ugly
You can trigger the context menu by doing a tap-and-hold on any item in the list (Figure 11-5).
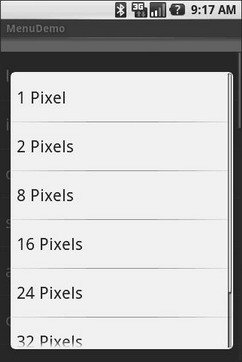
Figure 11-5. The same application, showing a context menu
Once again, choosing an option sets the divider height.


