Книга: C# 2008 Programmer
Creating a Bare-Bones Silverlight Application
Creating a Bare-Bones Silverlight Application
Let's create a bare-bones Silverlight application by referencing all the necessary files required in a Silverlight application. First, remember to download the Silverlight 1.0 SDK from http://www.microsoft.com/downloads.
Once the SDK is downloaded, double-click on the Silverlightv1.0SDK.msi file to install the files onto your local computer (use the default directory).
Create a new folder in C: and name it Silverlight.
Copy the Silverlight.js file located in the C:Program FilesMicrosoft Silverlight 1.0 SDKToolsSilverlight.js folder into C:Silverlight.
Using Notepad, create the following HTML file; name it Default.html, and save it in the C:Silverlight folder:
<!DOCTYPE html

 PUBLIC "-//W3C//DTD XHTML 1.0 Transitional//EN"

 "http://www.w3.org/TR/xhtml1/DTD/xhtml1-transitional.dtd">

<html xmlns="http://www.w3.org/1999/xhtml" xml:lang="en">

 <head>

  <title>Our First Silverlight Application</title>

  <script type="text/javascript" src="Silverlight.js"></script>

  <script type="text/javascript" src="MySilverlight.js"></script>

 </head>

 <body>

  <!-- location for the Silverlight plug-in-->

  <div> </div>

  <script type="text/javascript">

   // Retrieve the div element you created in the previous step.

   var parentElement =

    document.getElementById("SilverlightPluginHost");

   // creates the Silverlight plug-in.

   createSilverlightPlugin();

  </script>

 </body>

</html>
This HTML file is the page that will host the Silverlight plug-in. Notice that it references two JavaScript files:
? Silverlight.js
? MySilverlight.js
You've already added the first one. Now, using Notepad, create the following JavaScript file; name it MySilverlight.js, and save it in C:Silverlight.
function createSilverlightPlugin() {

 Silverlight.createObject(

 "UI.xaml", // Source property value.

 parentElement, // DOM reference to hosting DIV tag.

 "mySilverlightPlugin", // Unique plug-in ID value.

 { // Per-instance properties.

  width:'300', // Width of rectangular region of

               // plug-in area in pixels.

  height:'300', // Height of rectangular region of

                // plug-in area in pixels.

  inplaceInstallPrompt:false, // Determines whether to display

                              // in-place install prompt if

                              // invalid version detected.

  background:'#D6D6D6', // Background color of plug-in.

  isWindowless:'false', // Determines whether to display

                        // plug-in in Windowless mode.

  framerate:'24', // MaxFrameRate property value.

  version:'1.0' // Silverlight version to use.

 },

 {

  onError:null, // OnError property value --

                // event handler function name.

  onLoad:null // OnLoad property value --

              // event handler function name.

 },

 null); // Context value -- event handler

        // function name.

}
This JavaScript file contains the logic behind your Silverlight application. It loads the Silverlight plug- in as well as the XAML file (UI.xaml, which is defined in the next section).
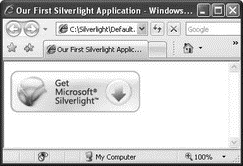
Double-click on Default.html now to load it in Internet Explorer. You will see the message shown in Figure 19-2 if your web browser does not have the Silverlight plug-in installed.

Figure 19-2
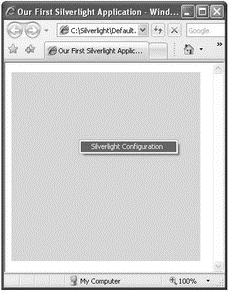
To install the Silverlight plug-in, click on the Get Microsoft Silverlight logo and follow the onscreen instructions. Once the plug-in is installed, refresh the page and you should see a gray box (there is nothing displayed yet, thus just a gray box). Right-click on the gray box and select Silverlight Configuration to verify the version of the plug-in installed (see Figure 19-3).

Figure 19-3
- Silverlight 1.0
- Silverlight 2.0
- Compiling the user-land applications
- Creating CDs from the Command Line
- Creating and Deleting Device Objects
- Creating a Delegate
- CHAPTER 6 Productivity Applications
- Creating a Root Password and User Accounts
- Available Applications
- Creating Users
- Productivity Applications Written for Microsoft Windows
- Creating CDs and DVDs with Fedora's Graphical Clients


