Êíèãà: Beginning Android
It’s All The Same, Just Different
It’s All The Same, Just Different
Since, by default, Android destroys and re-creates your activity on a rotation, you may only need to hook into the same onSaveInstanceState() that you would if your activity were destroyed for any other reason (e.g., low memory). Implement that method in your activity and fill in the supplied Bundle with enough information to get you back to your current state. Then, in onCreate() (or onRestoreInstanceState(), if you prefer), pick the data out of the Bundle and use it to bring your activity back to the way it was.
To demonstrate this, let’s take a look at the Rotation/RotationOne project. It, and the other sample projects used in this chapter, which are also found in the source code section of the Apress web site, use a pair of main.xml layouts, one in res/layout/ and one in res/layout-land/ for use in landscape mode. Here is the portrait layout:
<?xml version="1.0" encoding="utf-8"?>

<LinearLayout xmlns:android="http://schemas.android.com/apk/res/android"

 android:orientation="vertical"

 android:layout_width="fill_parent"

 android:layout_height="fill_parent"

>

 <Button android:id="@+id/pick"

  android:layout_width="fill_parent"

  android:layout_height="fill_parent"

  android:layout_weight="1"

  android:text="Pick"

  android:enabled="true"

 />

 <Button android:id="@+id/view"

  android:layout_width="fill_parent"

  android:layout_height="fill_parent"

  android:layout_weight="1"

  android:text="View"

  android:enabled="false"

 />

</LinearLayout>
while here is the similar landscape layout:
<?xml version="1.0" encoding="utf-8"?>

<LinearLayout xmlns:android="http://schemas.android.com/apk/res/android"

 android:orientation="horizontal"

 android:layout_width="fill_parent"

 android:layout_height="fill_parent"

>

 <Button android:id="@+id/pick"

  android:layout_width="fill_parent"

  android:layout_height="fill_parent"

  android:layout_weight="1"

  android:text="Pick"

  android:enabled="true"

 />

 <Button android:id="@+id/view"

  android:layout_width="fill_parent"

  android:layout_height="fill_parent"

  android:layout_weight="1"

  android:text="View"

  android:enabled="false"

/>

</LinearLayout>
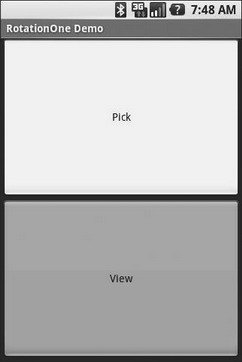
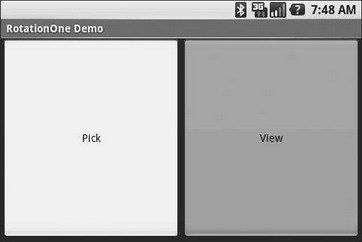
Basically, it is a pair of buttons, each taking up half the screen. In portrait mode, the buttons are stacked; in landscape mode, they are side-by-side.
If you were to simply create a project, put in those two layouts, and compile it, the application would appear to work just fine — a rotation (Ctrl-F12 in the emulator) will cause the layout to change. And while buttons lack state, if you were using other widgets (e.g., EditText), you would even find that Android hangs onto some of the widget state for you (e.g., the text entered in the EditText).
What Android cannot automatically help you with is anything held outside the widgets.
This application is derived from the Pick demo used in Chapter 24. There, clicking one button would let you pick a contact, then view the contact. Here, we split those into separate buttons, with the “View” button only enabled when we actually have a contact.
Let’s see how we handle this, using onSaveInstanceState():
public class RotationOneDemo extends Activity {

 static final int PICK_REQUEST = 1337;

 Button viewButton = null;

 Uri contact = null;

 @Override

 public void onCreate(Bundle savedInstanceState) {

  super.onCreate(savedInstanceState);

  setContentView(R.layout.main);

  Button btn = (Button)findViewById(R.id.pick);

  btn.setOnClickListener(new View.OnClickListener() {

   public void onClick(View view) {

    Intent i = new Intent(Intent.ACTION_PICK,

     Uri.parse("content://contacts/people"));

    startActivityForResult(i, PICK_REQUEST);

   }

  });

  viewButton = (Button)findViewById(R.id.view);

  viewButton.setOnClickListener(new View.OnClickListener() {

   public void onClick(View view) {

    startActivity(new Intent(Intent.ACTION_VIEW, contact));

   }

  });

  restoreMe(savedInstanceState);

  viewButton.setEnabled(contact!=null);

 }

 @Override protected void onActivityResult(int requestCode, int resultCode,

  Intent data) {

  if (requestCode==PICK_REQUEST) {

   if (resultCode==RESULT_OK) {

    contact = data.getData();

    viewButton.setEnabled(true);

   }

  }

 }

 @Override

 protected void onSaveInstanceState(Bundle outState) {

  super.onSaveInstanceState(outState);

  if (contact!=null) {

   outState.putString("contact", contact.toString());

  }

 }

 private void restoreMe(Bundle state) {

  contact = null;

  if (state!=null) {

   String contactUri = state.getString("contact");

   if (contactUri!=null) {

    contact = Uri.parse(contactUri);

   }

  }

 }

}
By and large, it looks like a normal activity… because it is. Initially, the “model” — a Uri named contact — is null. It is set as the result of spawning the ACTION_PICK sub-activity. Its string representation is saved in onSaveInstanceState() and restored in restoreMe() (called from onCreate()). If the contact is not null, the “View” button is enabled and can be used to view the chosen contact.
Visually, it looks like Figures 26-1 and 26-2.

Figure 26-1. The RotationOne application, in portrait mode

Figure 26-2. The RotationOne application, in landscape mode
The benefit to this implementation is that it handles a number of system events beyond mere rotation, such as being closed by Android due to low memory.
For fun, comment out the restoreMe() call in onCreate() and try running the application. You will see that the application “forgets” a contact selected in one orientation when you rotate the emulator or device.
- 4.4.4 The Dispatcher
- About the author
- Chapter 7. The state machine
- Chapter 5 Installing and Configuring VirtualCenter 2.0
- Chapter 13. rc.firewall file
- Appendix E. Other resources and links
- 3.2.1.2. Íà÷àëüíîå âûäåëåíèå ïàìÿòè: malloc()
- Example NAT machine in theory
- The final stage of our NAT machine
- Compiling the user-land applications
- Installation on Red Hat 7.1
- The conntrack entries


