Книга: Fedora™ Unleashed, 2008 edition
Configuring Samba with SWAT
Configuring Samba with SWAT
The Samba team went all out to provide a handy GUI tool to administer almost every aspect of Samba, called SWAT. This section provides a simple example of how to use SWAT to set up SMB access to a user's home directory and how to share a directory.
You need to perform a few steps before you can start using SWAT. First, make sure you have the Samba and the samba-swat RPM packages installed. To then enable SWAT access to your system, edit the /etc/xinetd.d/swat file by changing the following line:
disable = yes
Change the word yes to the word no, like so:
disable = no
Note that you must do this as root, as regular users cannot change this file. Save the file, and then restart the xinetd daemon, using either the system-config-services client or the xinetd shell script under /etc/rc.d/init.d, as follows:
# service xinetd restart
Next, start an X session, launch any web browser, and browse to the http://localhost:901 uniform resource locator (URL). You are presented a login prompt. Enter the root username and password, and then click the OK button. The screen clears, and you see the main SWAT page, as shown in Figure 19.4.
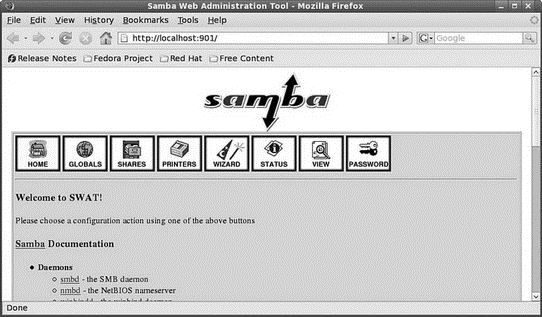
FIGURE 19.4 SWAT can be used to easily configure and administer Samba on your system.
TIP
You can also configure Samba with Fedora's system-config-samba client. Launch the client from the command line of an X terminal window or select the System, Administration, Samba menu item (as shown later in Figure 19.10).
First, click the GLOBALS icon in SWAT's main page. You see a page similar to the one shown in Figure 19.5. Many options are in the window, but you can quickly set up access for hosts from your LAN by simply entering one or more IP addresses or a subnet address (such as 192.168.0. — note the trailing period, which allows access for all hosts; in this example, on the 192.168.0 subnet) in the Hosts Allow field under the Security Options section. If you need help on how to format the entry, click the Help link to the left of the field. A new web page appears with the pertinent information.
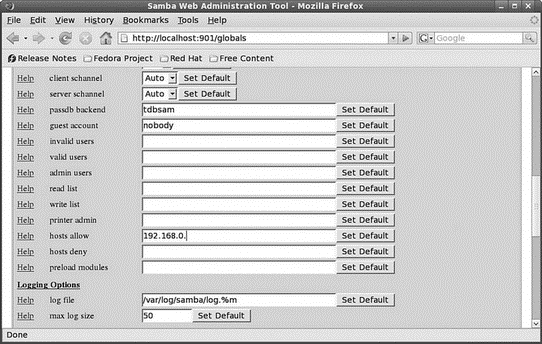
FIGURE 19.5 Configure Samba to allow access from specific hosts or subnets on your LAN.
When finished, click the Commit Changes button to save the global access settings. The next step is to create a Samba user and set the user's password. Click the PASSWORD icon on the main SWAT page (refer to Figure 19.4). The Server Password Management page opens, as shown in Figure 19.6. Type a new username in the User Name field; then type a password in the New Password and Re-type New Password fields.
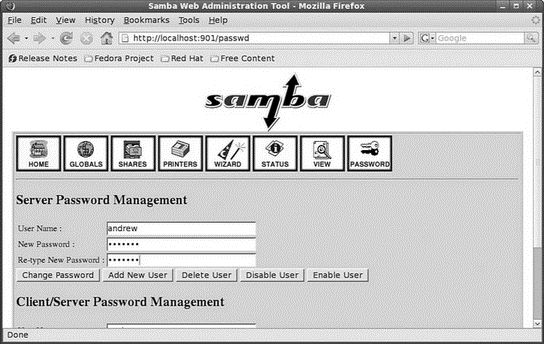
FIGURE 19.6 Enter a Samba username and password in the SWAT Password page.
NOTE
You must supply a username of an existing system user, but the password used for Samba access does not have to match the existing user's password.
When finished, click the Add New User button. SWAT then creates the username and password and displays Added user username (where username is the name you entered). The new Samba user should now be able to gain access to the home directory from any allowed host if the Samba (smb) server is running.
For example, if you have set up Samba on a host named rawhide that has a user named andrew, the user can access the home directory on rawhide from any remote host (if allowed by the GLOBALS settings), perhaps by using the smbclient command like so:
$ smbclient //rawhide/andrew -U andrew

Password:

Domain=[RAWHIDE] OS=[Unix] Server=[Samba 3.0.26a-6.fc8]

smb: > pwd

Current directory is rawhideandrew

smb: > quit
Click the Status icon in the toolbar at the top of the SWAT screen to view Samba's status or to start, stop, or restart the server. You can use various buttons on the resulting web page to control the server and view periodic or continuous status updates.
You can also use SWAT to share a Linux directory. First, click the Shares icon in the toolbar at the top of the main Samba page (refer to Figure 19.4). Type a share name in the Create Shares field, and then click the Create Shares button. The SWAT Shares page displays the detailed configuration information in a dialog box as shown in Figure 19.7, providing access to detailed configuration for the new Samba share.
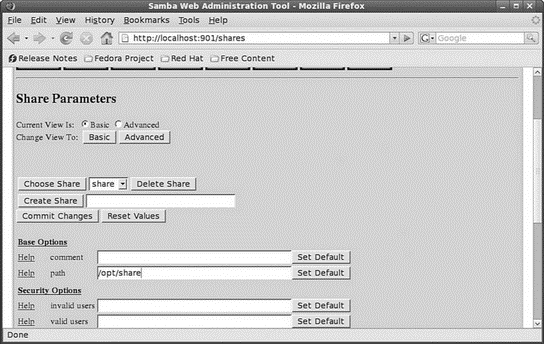
FIGURE 19.7 Use the SWAT Shares page to set up sharing of a portion of your Linux file system.
Type the directory name (such as /opt/share) you want to share in the Path field under the Base options. Select No or Yes in the Read Only field under Security options to allow or deny read and write access. Select Yes in the Guest OK option to allow access from other users and specify a hostname, IP address, or subnet in the Hosts Allow field to allow access. Click the Commit Changes button when finished. Remote users can then access the shared volume. This is how a Linux server running Samba can easily mimic shared volumes in a mixed computing environment!
Alternatively, use the system-config-samba client (from the command line or the Server Settings Samba Server menu item on the System Settings menu). Figure 19.8 shows the properties of a shared directory named /opt/share. Use the Add button to create new shares and the Properties button (both located on the main screen) to edit the share's access options. Use the Preferences menu to edit your Samba server's general settings or to create and manage Samba users.
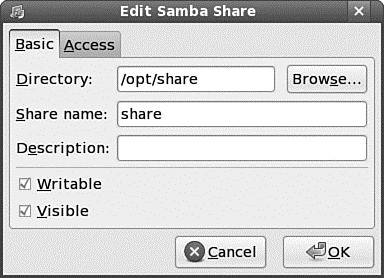
FIGURE 19.8 Configure a Samba share by editing the share defaults.
- Глава 6 В стиле Samba
- Configuring the Server
- Putting Samba to Work
- Configuring Samba with system-config-samba
- Testing Samba with the testparm Command
- Mounting Samba Shares
- Сценарии Samba
- Chapter 5 Installing and Configuring VirtualCenter 2.0
- Using Double Quotes to Resolve Variables in Strings with Embedded Spaces
- Drawbacks with restore
- 7. AGGREGATION WITH INDEPENDENT WORKS


